
Are you looking for an easy way to spruce your living space with a unique homemade touch? Crochet is the perfect craft to make something special for your home that can last for years.

With just some basic supplies and a few wood planks, you can create a beautiful table runner that adds personality to your furniture and creates texture and warmth in any room. If you know the basics of crocheting, like making a chain stitch and single crochet, this tutorial will provide you with all the information you need to make your stylish table runner.
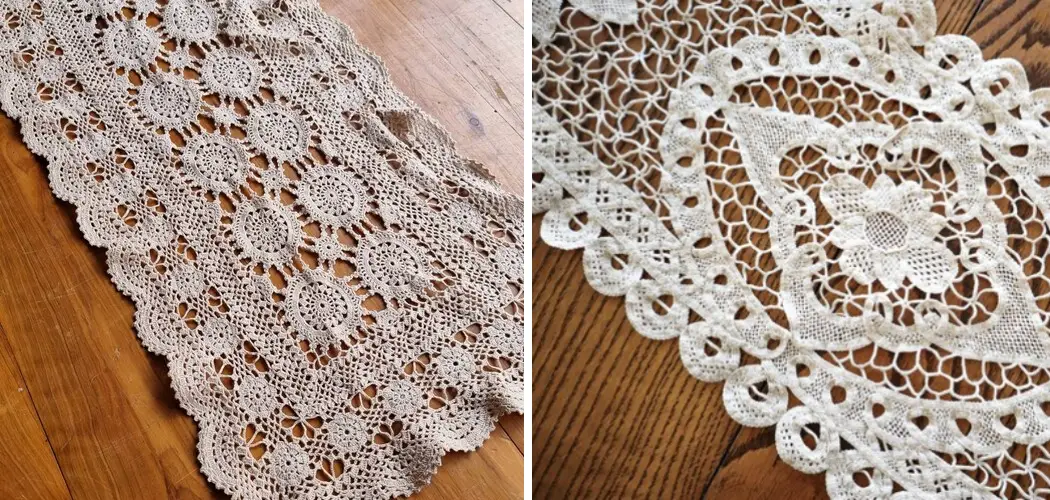
In this blog post, we’ll take you step by step through how to crochet a table runner from start to finish. Whether you are new to crocheting or have previous experience, it’s sure to be an enjoyable project.
What Will You Need?
- Worsted weight yarn
- Crochet hook (size H)
- Scissors
- Tape measure
- Sewing needle with large eye
- Planks of wood (measuring the size of your table runner)
Once you have all the necessary supplies, it’s time to start crocheting your table runner.
9 Easy Steps on How to Crochet a Table Runner
Step 1: Crochet the Runner
Start by chaining 20 stitches. This is the foundation row of your runner and should be about 20 inches long when complete. After you’ve made the chain stitch, single crochet (SC) in each stitch across the row, Make sure you keep your tension tight and even throughout the entire project.
Step 2: Increase
Once you reach the end of the first row, it’s time to increase. To do this, chain three stitches, then single crochet in the next stitch. This is an increased stitch, which will widen your table runner as you go.

Repeat this technique across the row until the width of your runner is 40 inches. Remember to keep your tension even and tight throughout for the best results.
Step 3: Repeat Rows
Now it’s time to repeat rows 1-2 until your table runner is 60 inches long. This will give you a large and wide runner to fit any table. Be careful to keep your tension even throughout the entire project.
Step 4: Fasten Off
It’s time to fasten off once you have reached your desired length. To do this, cut the yarn and pull the end of the strand through the last loop on your hook. Pull it tight to secure it in place.
Step 5: Weave in the Ends
Now that you’ve fastened off, you’ll have two loose ends of yarn to deal with – one at the beginning of your work and the other at the end. To tidy these up, thread the yarn end through your sewing needle. Then, weave the needle in and out of your work a few times to secure the end. After weaving in a few inches, you can cut off the remaining yarn. Repeat the process with the other end.
At this point, your basic table runner is complete. But if you want to add a bit of flair, consider adding a decorative border or fringe to your table runner. These extra steps are completely optional but can add a nice finishing touch to your work. Let’s proceed with those.
Step 6: Adding a Border
If you wish to add a border to your table runner, choose a contrasting color for a standout effect or a similar shade for a more subtle look. Start in any corner of the runner and create a standing double crochet.

Now, create three double crochets in the same space. Next, double crochet in each stitch across to the next corner. In the corner, make three double crochets in the same stitch. Continue this pattern around your runner.
When you reach the starting corner, create two more double crochets in the same space as your standing double crochet. Join the round with a slip stitch at the top of the first double crochet.
Step 7: Adding Fringes (Optional)
A fringe can add a decorative touch to your table runner. Cut several lengths of yarn approximately twice the length you want your fringe to be. Fold the strands in half and thread the loop end through a stitch at one end of the runner.
Now, thread the loose ends of the yarn through the loop and pull tight. Repeat this process across each end of the table runner. Once you’ve added all your fringes, trim the ends to be the same length.
Remember, creativity is key when crocheting. Feel free to experiment with different colors, patterns, and textures to create a unique crochet table runner that flaunts your style.
Step 8: Finishing Touches
Once you’ve added a border and fringe to your table runner, you can add some final touches to make it stand out. Consider adding some beads or small charms to the fringe for a bit of sparkle, or use a yarn dye to create a gradient effect across the length of the runner.
Remember always to tie off and weave in loose yarn ends to ensure your creation stays intact.
Finally, lay your table runner out flat and use a steamer or iron to gently press it, ensuring it lies flat and looks its best on your table. With these final steps, your crochet table runner is complete, ready to add charm and warmth to your home.
Step 9: Care and Maintenance
Proper care of your crochet table runner will ensure it remains beautiful and durable for years. Preferably, hand wash your runner using cold water and a mild detergent.
Avoid using bleach, as it can damage the yarn fibers. Gently squeeze out excess water without twisting or wringing the runner. Lay it flat on a towel and reshape it as it dries.

Avoid direct sunlight or heat sources, as they can cause the colors to fade and the fibers to become brittle. In case of any snags or loose threads, do not pull them, but use a needle to weave them back into the runner.
By following these simple steps, you can easily create a beautiful crochet table runner for your home. So what are you waiting for? Grab your supplies and get crocheting! With some creativity and effort, you’ll have a gorgeous handmade item to be proud of!
5 Additional Tips and Tricks
- When crocheting a table runner, keeping your tension even throughout the project is important. This will ensure that the table runner lays flat and looks beautiful once finished.
- If you want to add a special design or motif to your table runner, use chain stitches or other decorative stitches. Be sure to plan where you’ll put each stitch before you begin.
- When selecting a yarn for your table runner, make sure it’s sturdy enough to hold up against wear and tear, as it will likely be walked on regularly.
- If your table runner is larger than the yarn required for one project, consider using multiple colors to add interest and depth to the design.
- Finally, block your table runner after it’s finished to ensure that all stitches are even and uniform in shape. Blocking will help make sure the table runner lays flat when laid out on the table.
These tips and tricks can help make crocheting a beautiful table runner easier than ever! With careful planning and attention to detail, you can create a timeless piece that you and your family will enjoy for years to come.
5 Things You Should Avoid
- Use a thick of yarn as it will be difficult to see your stitches and will need more support for the runner.
- Avoid using slippery yarns like silk or satin, as they can cause the table runner to slip off the table easily.
- Refrain from crocheting too tightly, as this can make the final piece look stiff and unnatural.
- Ensure the yarn you use won’t shrink if it needs to be washed.
- Use only a few colors, as this can make the table runner look cluttered and clear. Stick with neutral tones for a timeless design that will never go out of style.
With these tips, you can create a beautiful and stylish table runner that will look great on any dining or side table. Enjoy crocheting and decorating your home with a handmade piece you can be proud of!
What is a Good Crochet Stitch for a Table Runner?

For a table runner, you’ll want to choose a durable and attractive stitch. The single crochet stitch is the most popular choice for a beginner as it’s easy to learn and provides stability. For more experienced crocheters, the double crochet or even treble crochet can provide a beautiful texture and depth to your design. The herringbone half double crochet is another great stitch choice for a table runner, and it can provide an airy and delicate texture.
No matter what type of stitch you choose, ensure it’s appropriate for the yarn or thread you’re using to ensure that your table runner looks beautiful when finished. You can also combine different stitches to create interesting patterns and designs. Have fun experimenting with different stitches and colors to create a unique table runner you’ll love!
Conclusion
How to crochet a table runner can be an enjoyable and rewarding experience. With the right supplies, tips, and tricks, anyone can create a lasting piece of work that can adorn any dining room or kitchen table. There are a variety of stitches to make different designs or colors, so your unique style will shine through.
Following this guide will give you all the tools you need to start crocheting your attractive table runner today!
Don’t be intimidated; it is easier than ever before to learn how to crochet a beautiful and useful piece of artwork you can showcase with pride in your home or give away as the perfect gift. Get creative, take a breath, and enjoy this craft!