
Do you want to add a cozy warmth and style to winter outfits? Learn how to crochet a snood with only a few basic supplies – perfect for beginners and experts alike. With this helpful guide, crafting your trendy crocheted snood will quickly become one of your favorite ways to beat the winter chill!
Whether you’ve been crocheting for years or have never held a crochet hook, creating your snood will be an enjoyable and rewarding experience. All you need to get started is the right yarn, some basic tools, and just a few minutes of your time.

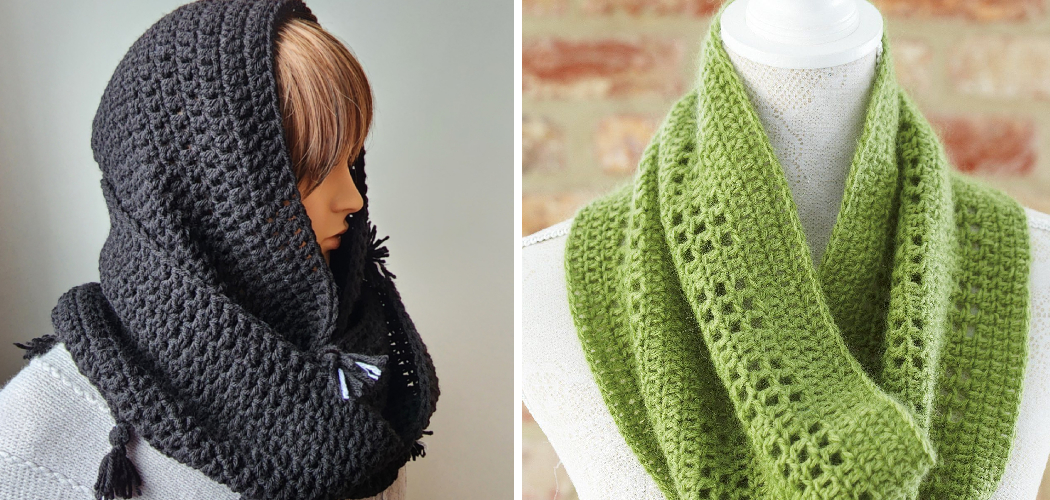
Get ready to bundle up in fashionable comfort as you explore all the different colors, textures, and sizes available to create a unique piece that perfectly captures your style.
What Will You Need?
- Yarn in the desired color and weight
- Crochet hook that matches your yarn’s recommended size
- Scissors
- Tapestry needle
Once you’ve gathered everything together, it’s time to start crocheting your snood!
10 Easy Steps on How to Crochet a Snood
Step 1: Make the Base Chain
Start by making a foundation chain of at least 60-70 chains. To do this, begin with a slip knot and make a loop with your yarn. Then, wrap the yarn around your hook from back to front and draw it through the loop. This will create one chain stitch, which you can repeat for as long as needed until you’ve created your desired number of chains.
Step 2: Make Single Crochet Stitches
To make single crochet stitches, start with a foundation chain and insert the hook into the second chain from the hook. Wrap the yarn over the hook and pull it through the chain to create one loop on your hook. Then, wrap the yarn around the hook and draw it through both loops to create a single crochet stitch.
Repeat this process for each chain in your foundation chain until you’ve made as many single crochet stitches as needed, being sure to slip stitch at the end of each row.
Step 3: Make Half Double Crochet Stitches
Half double crochet stitches are made by wrapping the yarn around your hook twice and inserting it into a stitch or chain from the previous row. Then, draw up a loop and wrap the yarn to create three loops on your hook. Finally, draw through all three loops to create one half-double crochet stitch.

Repeat this process as often as needed until you reach your desired size and shape.
Step 4: Continue with Single and Half Double Crochet Stitches
Proceed with alternating rows of single and half-double crochet stitches. This will create a textured pattern in your snood. Remember to start each new row with a turning chain. This helps to make the edge of your work even and neat and provides the height needed for the next row of stitches.
Continue crocheting until you’ve reached your desired length for the snood. Make sure to finish on a single crochet row for a neat edge.
Step 5: Join the Ends
After you’ve reached your desired length, it’s time to join the two ends of your work to create the circular snood shape. Without cutting the yarn, fold your work so the two ends meet. Insert your hook through both the first stitch of your last row and the corresponding stitch of your foundation chain.
Yarn over, pulling through all loops on your hook to create a slip stitch. Continue this process along the entire length of your work until both ends are fully joined. Ensure your work has stayed intact during this process.
Step 6: Weave in Loose Ends
Once you have joined the two ends of your snood, cut the yarn, leaving a tail of about 6 inches. Thread this tail onto your tapestry needle. Now, weave in this loose end through the inside of the snood. Try to follow the path of the stitches as closely as possible to make the endless noticeable.
You can trim off the remaining yarn once you’ve woven in about 4 inches of the tail. This will prevent any loose ends from sticking out of your finished snood. Repeat this process with any other loose ends you may have.
Step 7: Finishing Up
Congratulations! You’ve now completed crocheting your snood! The final step is to simply give your snood a little shake to fluff it up and ensure all the stitches are even. If you notice any tighter or looser areas than others, gently pull on the stitches in these areas to even them out. This will help your snood to lay flat and look its best.
Step 8: Care and Maintenance
Taking care of your handmade snood is essential to keep it in good shape and prolong its lifespan. Depending on the yarn you choose, you can machine wash your snood or require hand washing. Always check the care instructions for your specific yarn.

If hand washing is required, use a gentle detergent and lukewarm water. Do not wring out the snood; gently squeeze out excess water and lay it flat to dry. To maintain the shape of your snood, you may occasionally need to stretch it out gently while it’s drying.
Step 9: Embrace the Versatility
Your handmade snood is a warm accessory and a versatile one. It can be worn in multiple ways, depending on your style or mood. You can wear it around your neck like a scarf or pull it up to cover your head like a hood when the weather gets chilly.
You can also fold it in half and wear it as a cowl. Remember, there’s no right or wrong way to wear your snood. Experiment with different styles and have fun with them!
Step 10: Enjoy Your Custom-Made Snood
There you have it – your homemade snood is complete and ready to wear! Now, it’s time to enjoy the fruits of your labor. Whether you’re heading out on a chilly morning walk or simply want to add a stylish accessory, your snood is perfect for the occasion.
It’s a testament to your skill, creativity, and patience. Wear it with pride! Remember, you’ve not just created a useful item, but you’ve also learned and honed a new skill. This is just the beginning. Keep crocheting and explore more patterns and designs to expand your crafting journey.
Following these simple steps, you know how to crochet a snood. So go ahead and make one for yourself or as a gift for someone special! This might be the start of something beautiful.
5 Additional Tips and Tricks
- When crocheting a snood, keeping your tension consistent for the stitches to remain even is important.
- Use two crochet hooks at once to easily count the number of stitches and track where you are in a pattern.
- To ensure that the edges of your snood are neat and uniform, use an invisible join when finishing off a round or row.
- Choose a yarn with natural fibers such as wool, alpaca, or cotton to ensure the snood is thick and warm.
- Be creative and add your style to your crochet snood by trying different stitch patterns or adding decorative embellishments!

With these tips and tricks, you can crochet a beautiful snood quickly! Remember to experiment with different colors and fibers to find your perfect combination. You can even use multiple strands of yarn together for a unique look. Have fun crocheting!
5 Things You Should Avoid
- Don’t use too lightweight yarn for a snood, as it will not provide enough warmth.
- Avoid crochet hooks that are too large or too small for your following pattern.
- Don’t pull the yarn too tightly when crocheting to avoid making your stitches unevenly sized.
- Avoid rushing through a pattern, as it will only result in mistakes and an unsatisfactory product.
- Feel free to rip out a few stitches if you have made a mistake- everyone makes them and it’s all part of the learning process!
Now that you know what to do and what to avoid, you’re ready to start crocheting your own snood! Don’t forget to take breaks when needed, and be patient!
5 Different Design Ideas
- Spice up a classic pattern by adding one or more colorful stripes.
- Create an ombre effect by gradually changing the color of your yarn as you crochet.
- Make a snood with texture by combining post stitches and front loop only stitches.
- Add some sparkle to your design with metallic thread or sequins!
- Make your snood extra warm and cozy by combining two or more different yarns.
There’s no limit to what you can create with crochet! Get creative and put your spin on the classic snood design. With these ideas and tips, you can make a beautiful and unique piece quickly.

What Shape is a Snood?
A snood is typically shaped like a tube, with one side being slightly longer than the other. This shape provides extra warmth and comfort as it wraps around your neck and head. The length of the snood can be adjusted depending on how you want it to fit- just make sure to measure twice before cutting! You can also experiment with different shapes, such as a cowl or infinity scarf.
Another option is to use a bulky yarn and make your snood have extra thickness. This will give you a luxurious feeling around your neck and provide maximum warmth during the colder months. With all these options, you’ll surely find the perfect shape for your snood!

Conclusion
You’ve now mastered the art of crocheting a snood! Keep practicing, and it will become easier each time. Remember to have fun with the colors and patterns you use in your snood designs. Also, take pictures of your creations and share them on social media so your friends and family can admire and marvel at your snood-making skills.
After all, what better way to show off those skills than by putting them on display? Lastly, remember the most important part: Enjoy the process of making these beautiful garments as much as you enjoy wearing them!
Hopefully, the article on how to crochet a snood has been helpful and inspiring! With time, practice, and the right tools, you’ll be able to make all kinds of snoods you can enjoy for many years. Good luck, and happy crocheting!