
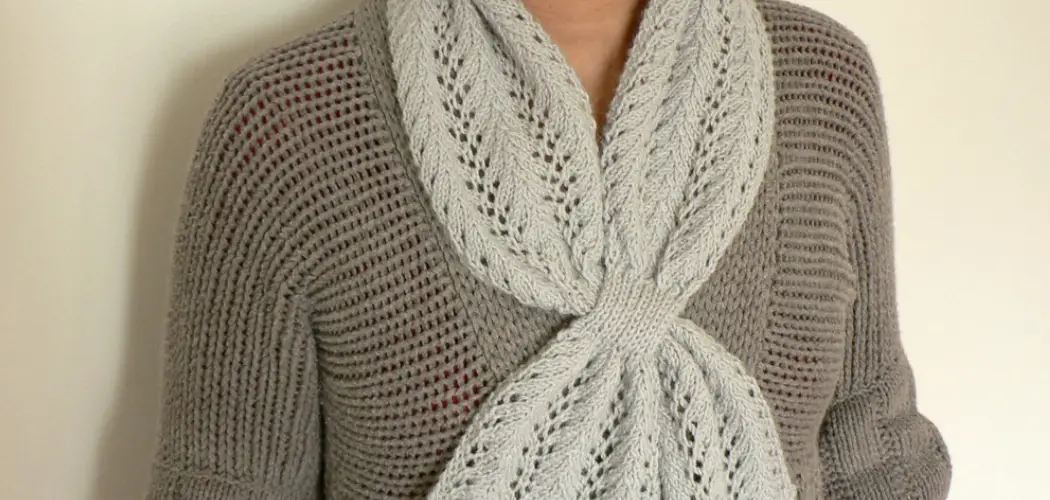
Unlocking a new dimension in crochet creativity, crafting a scarf lengthwise introduces a unique approach to this classic accessory. Departing from the traditional horizontal method, crocheting a scarf lengthwise allows for greater flexibility in design, texture, and stitch patterns. In this tutorial, we’ll explore the step-by-step process of how to crochet a scarf lengthwise, providing insights into selecting the right yarn, understanding the stitch anatomy, and achieving the desired width and length.

Whether you’re a seasoned crocheter seeking a fresh perspective or a beginner eager to embark on a stylish project, this guide will unravel the techniques necessary to crochet a scarf lengthwise with confidence. Join us on a journey where the stitches flow seamlessly from one end to the other, resulting in a scarf that not only keeps you warm but also showcases your creativity in a truly distinctive and eye-catching manner.
Benefits and Unique Features of Lengthwise Crochet
- Versatility: Lengthwise crochet can be used to create a variety of items, from basic scarves to more complex designs. The technique allows for greater flexibility in creating different patterns and textures.
- Customizable Length: With traditional crochet, the length of an item is determined by the number of rows worked. However, with lengthwise crochet, the length can easily be adjusted by simply adding or removing stitches.
- Efficient Use of Yarn: Lengthwise crochet typically uses less yarn than traditional crochet. This is because the stitches are worked horizontally, which requires fewer rows to achieve the desired length.
- Continuous Stitching: Unlike traditional crochet where individual rows are completed and then joined together, lengthwise crochet is worked in one continuous stitch. This results in a seamless and clean finish to the item.
- Easy to Work With: Lengthwise crochet can be easier for beginners to learn as it involves repetitive stitches and does not require turning or counting rows.

Yarn Selection for a Scarf
- Weight: The weight of the yarn refers to its thickness, and it can vary from very fine to super bulky. For a scarf, you’ll want to choose a medium or worsted weight yarn – this is typically labeled as number 4 on the label. This weight will give you a nice balance between being easy to work with and creating a warm, cozy scarf.
- Material: Yarn comes in a variety of materials, from cotton to wool to acrylic. Each type has its own unique qualities and will produce different results. For a scarf, you’ll want to choose a material that is soft against the skin and will provide warmth. Some popular choices include merino wool, alpaca, or a soft acrylic blend.
- Color: This is where you can really get creative! The color of your yarn will determine the overall look and feel of your scarf. You could opt for a solid color for a classic, timeless look, or choose a variegated yarn for a more playful and fun scarf. Whichever you choose, make sure it complements your personal style and wardrobe.
- Amount: It’s always a good idea to have more yarn than you think you’ll need. You never want to run out of yarn in the middle of your project, so make sure to purchase enough for the entire length of your scarf.
Appropriate Crochet Hook Size
Before diving into how to crochet a scarf lengthwise, it is important to first understand and choose the appropriate hook size. The ideal hook size will vary depending on the type of yarn you are using and the desired tension of your stitches.
Crochet hooks come in various sizes, ranging from B (2.25mm) to S (19mm). The most commonly used hook sizes for scarf crocheting are in the range of H to J (5mm-6mm). However, it is always best to check the yarn label or gauge swatch for recommended hook size.

A smaller hook will create tighter stitches and a thicker fabric, while a larger hook will produce looser stitches and a more open texture. Keep in mind that your tension also plays a role in determining the final outcome of your scarf.
If you are new to crochet or unsure of what hook size to use, it is recommended to start with a medium-sized hook (such as an H or I) and adjust accordingly based on your personal preference and desired scarf texture.
10 Methods How to Crochet a Scarf Lengthwise
1. Choose Your Yarn and Hook Size
The first step in crocheting a scarf lengthwise is to choose your yarn and hook size. A thicker yarn and larger hook will result in a bulkier, warmer scarf, while a thinner yarn and smaller hook will create a lighter, more delicate scarf. Consider the season and climate when choosing your yarn, as well as your personal style and preferences.
2. Create a Foundation Chain
To start your scarf, you will need to create a foundation chain. This is done by making a series of chain stitches using your chosen yarn and hook size. The length of your foundation chain should be the desired length of your finished scarf.
3. Single crochet across the foundation chain
Once you have created your foundation chain, you will begin working single crochet stitches across it. Insert your hook into the second chain from the hook, yarn over, pull up a loop, and then yarn over again and pull through both loops on the hook. Continue working single crochet stitches across the entire foundation chain. When you reach the end, you should have the same number of stitches as chains in your foundation chain.
4. Increase or Decrease Stitches as Needed
Depending on the pattern or design of your scarf, you may need to increase or decrease stitches as you work across the foundation chain. This can be done by adding extra stitches in each stitch or skipping stitches to decrease. This technique is essential when creating a triangular or asymmetrical scarf.
5. Continue Single Crocheting until Desired Width Is Reached
Continue working single crochet stitches until you have reached the desired width for your scarf. You can measure this by laying out your work flat and measuring from one end to the other. However many inches you want the width of your scarf to be, continue single crocheting until you have reached that point. Remember to always end each row with a turning chain and then turn your work.

6. Turn at the End of Each Row
Unlike traditional crochet where you turn at the beginning of each row, when crocheting lengthwise you will turn at the end of each row to continue working back and forth across the width of your scarf. This creates the lengthwise pattern and is essential to the construction of your scarf. You will continue working this way until you reach the desired length.
7. Add Stripes or Color Changes if Desired
One fun way to add interest to a lengthwise crocheted scarf is by incorporating stripes or color changes into your design. This can be done by switching colors at certain points in your pattern or alternating between two different colors for each row. You can even use variegated yarn to create a unique and colorful effect.
8. Use Different Stitch Patterns for Texture
Another way to add texture and interest to your scarf is by using different stitch patterns. You can experiment with different stitches such as the half double crochet, double crochet, or even a shell stitch to create unique textures. These stitches can be combined in different ways to create interesting patterns and designs.
9. Finish off with a Border if Desired
To give your scarf a more finished look, you can add a border along the edges. This can be done using single crochet stitches or any other stitch pattern of your choice. If you’re using single crochet stitches, insert your hook into the first stitch and begin working single crochet stitches all along the edge of your scarf. When you reach a corner, work 3 single crochet stitches to create a sharp turn. Keep working until you’ve gone all around the edges of your scarf.
10. Weave in Ends and Block if Needed
Once you have completed your scarf, make sure to weave in any loose ends and block it if necessary. Blocking involves wetting your scarf and shaping it into its final form before allowing it to dry completely. This helps to even out stitches and give your scarf a more polished look. You can also add any embellishments or tassels at this stage to customize your scarf even further.

Conclusion
In conclusion, crocheting a scarf lengthwise is an excellent way to create a unique and stylish accessory for the colder months. Not only does it offer a different technique to traditional scarf making, but it also allows for endless customization and creativity. don’t forget to share your creations with others! Whether it’s through social media or gifting them to loved ones, spreading the art of crochet is a great way to connect with others and inspire them to pick up a hook themselves. So what are you waiting for?
Grab some yarn and get crocheting! With this newfound knowledge on how to crochet a scarf lengthwise, the possibilities are endless. Get ready to turn heads with your handmade masterpiece and let your creative side shine through. Happy crocheting!
Expertise:
Crafting expert with a focus on innovative techniques and diverse materials.
Specialization:
- Textile arts (weaving, embroidery, and fabric dyeing)
- Woodworking and furniture design
- Mixed media and upcycling projects
Recognition:
- Featured in local art exhibits showcasing innovative craft projects
- Collaborated with community organizations to promote crafting workshops
- Received accolades for contributions to sustainable crafting initiatives
Mission:
- To inspire and empower crafters of all levels to discover their creative potential
- Encourages experimentation and self-expression through hands-on projects