
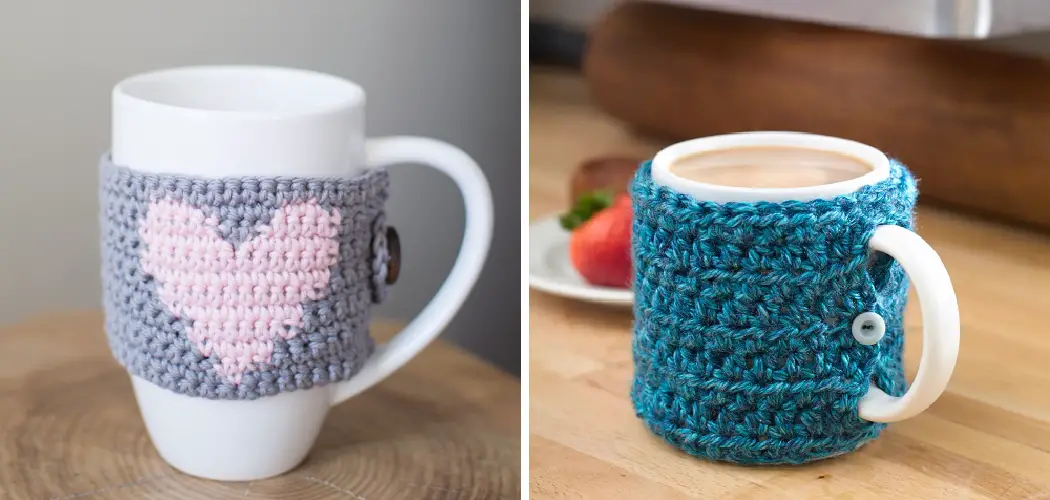
Adding a touch of warmth and charm to your daily coffee or tea routine is made easy with a handmade crochet mug cozy. This delightful and practical accessory not only keeps your beverages hot but also allows you to showcase your crochet skills while personalizing your favorite mugs.

In this guide, we’ll explore the step-by-step process of how to crochet a mug cozy, catering to both beginners and experienced crocheters alike.
From selecting the right yarn and mastering basic stitches to customizing your cozy with embellishments, this article provides a comprehensive tutorial for creating a cozy that reflects your style. Whether you’re crafting cozy gifts for loved ones or looking to add a handmade touch to your own collection, the art of crocheting a mug cozy is a satisfying and enjoyable endeavor that combines functionality with creativity.
Crochet Supplies and Safety Considerations
When it comes to crocheting, having the right supplies is essential. Not only will it make your project easier, but it can also ensure your safety while working with needles and yarn. Here are some basic supplies you’ll need for crocheting a cozy mug:
- Yarn: Choose a soft and durable yarn that’s suitable for the size of your hook and the type of stitch you’ll be using. Acrylic, wool, and cotton are popular choices for mug cozy projects.
- Crochet hook: The size of your hook will depend on the yarn weight and gauge of your project. Make sure to use a comfortable grip handle to prevent hand fatigue.
- Scissors: You’ll need scissors to cut yarn when changing colors or finishing your project.
- Yarn needle: This needle is used to weave in and hide loose ends of yarn.
- Stitch markers: These are useful for keeping track of stitches and marking the beginning of a round or pattern repeat.
- Measuring tape: Adding a cozy to a mug requires precise measurements, so having a measuring tape handy is a must.
Safety Considerations:
- Use the right size hook for your project to avoid straining your hand and wrist.
- Take breaks and stretch your hands and wrists periodically to prevent injury.
- Make sure you have good lighting while crocheting to avoid eye strain.
- Always use sharp scissors to prevent accidents while cutting yarn.
- Keep small objects like needles, pins, and stitch markers away from children and pets.
- If using multiple colors, make sure to secure loose ends to prevent tangles or tripping hazards.
Crocheting is a relaxing and enjoyable hobby, but it’s important to prioritize your safety while working with needles and yarn. By having the right supplies and following these safety tips, you can create beautiful mug cozies without any accidents or injuries.
10 Methods How to Crochet a Mug Cozy
1. Gather Your Supplies

Before you begin crocheting your mug cozy, you’ll need to gather the necessary supplies. You’ll need a crochet hook, yarn in the color of your choice, a pair of scissors, and a tapestry needle for weaving in the ends. Make sure to choose a yarn that is soft and durable so that it will last for many years.
2. Create a Slip Knot
Once you have all of your supplies ready, it’s time to begin crocheting! Start by creating a slip knot on your crochet hook. To do this, wrap the yarn around your index finger and then pull one end of the yarn through the loop. Pull tight on both ends of the yarn to secure the knot onto your crochet hook.
3. Chain Stitch
Next, you’ll need to create chain stitches with your crochet hook and yarn. To do this, wrap the yarn over your crochet hook from back to front and then pull it through the loop already on your crochet hook. Repeat this process until you have created enough chain stitches for the circumference of your mug cozy.
4. Single Crochet Stitches
Once you have created enough chain stitches for the circumference of your mug cozy, it’s time to start single crocheting! To do this, insert your crochet hook into the second chain from the hook and then wrap the yarn over from back to front before pulling it through both loops on your crochet hook. Repeat this process until you reach the end of your row of chain stitches.

5. Increase or Decrease Stitches
Depending on how large or small you want your mug cozy to be, you may need to increase or decrease stitches as you go along. To increase a stitch, simply insert two single crochets into one stitch instead of one single crochet into each stitch as usual; conversely.
If you want to decrease stitches, skip one stitch before inserting two single crochets into each stitch as usual instead of just one single crochet per stitch as usual. Keep repeating these steps until you reach desired size for mug cozy circumference-wise!
6. Join Seams
Once all rows are complete and the desired size is reached circumference-wise, join seams together by using the slip stitching technique: insert needle under first two loops at the beginning edge of row; pull thread through; insert needle under next two loops; repeat until all edges are joined together securely with no holes visible between them! This will ensure that the mug cozy stays closed when not in use (or when filled with hot liquids).
7. Add Edging

To add extra style and durability to the finished product, consider adding edging around the entire circumference: simply insert the needle at the beginning edge where the seam was joined together; pull the thread through; insert the needle again at the same spot but further away from first insertion point (this creates an “x” shape); repeat around the entire circumference until desired look is achieved!
8. Weave In Ends
To finish off project neatly and securely without any loose ends sticking out from sides or bottom edges – weave in all remaining ends using tapestry needles: simply take the end piece left after joining seams together (or after edging) and thread tapestry needle with it; weave needle in and out between stitches until there’s no more excess length left.
Cut off remaining piece close enough so that it won’t come undone but still far enough away that it won’t show visibly when finished product is being used!
9. Block & Shape Cozy
Before using the finished product – block & shape the mug cozy by laying it flat on a surface (such as a countertop) and stretching gently until the desired shape is achieved: make sure not to stretch too much, though, since doing so could cause fabric fibers to become weak/break easily over time due too excessive tension applied while shaping!
After shaping – let dry completely before using the finished product for best results (this usually takes about 24 hours).
10. Enjoy Your Mug Cozy!
Once everything is done – enjoy a new handmade mug cozy! Whether gifting or keeping for yourself – now there’s no excuse not to stay warm during chilly winter months thanks to new handmade creations made with love & care!
Things to Consider When Crocheting a Mug Cozy
When it comes to crocheting a mug cozy, there are a few things to keep in mind. This simple project may seem easy, but there are some factors that can make or break the final product. Here are some tips and considerations for making the perfect mug cozy:
- Yarn weight: The weight of the yarn you use will greatly affect the final product. Thicker yarns will create a chunkier, sturdier cozy, while thinner yarns will result in a more delicate and lightweight cozy. Consider what kind of mug you will be using the cozy for and choose your yarn weight accordingly.
- Hook size: Just like with yarn weight, the size of your crochet hook can also impact the final product. A smaller hook will create tighter stitches, while a larger hook will result in looser stitches. Experiment with different hook sizes to achieve the desired look and fit for your mug cozy.
- Mug size: It’s important to consider the size of the mug you will be using the cozy for when crocheting. This will determine how many stitches you need to make and the overall size of the cozy. Make sure to measure your mug before starting the project and adjust accordingly.
- Stitch pattern: The stitch pattern you choose will not only affect the appearance of the cozy, but also its functionality. Some stitch patterns may be more stretchy, while others may create a denser fabric. Consider what kind of texture and elasticity you want for your cozy and choose a stitch pattern accordingly.
- Button or closure: Depending on the design of your mug cozy, you may need to add a closure such as a button or loop. Make sure to choose a closure that will securely hold the cozy in place and is easy to use.

Conclusion
Crocheting is great for countless projects, whether for yourself or as a thoughtful gift to give others. From scarves to bags, the possibilities are endless. We’ve just looked at one project in particular – how to crochet a mug cozy – and with our step-by-step guide, you now have the resources to create something special.
Not only will your cozy help keep your hot drinks warm longer, it’s a fun activity that can bring people together. So why not grab some yarn and your favorite mug, and get out there! Collaborate with friends and family by showing them how to crochet a mug cozy so they can join in on the fun too! With just a few supplies and some practice, you’ll quickly become an expert.