
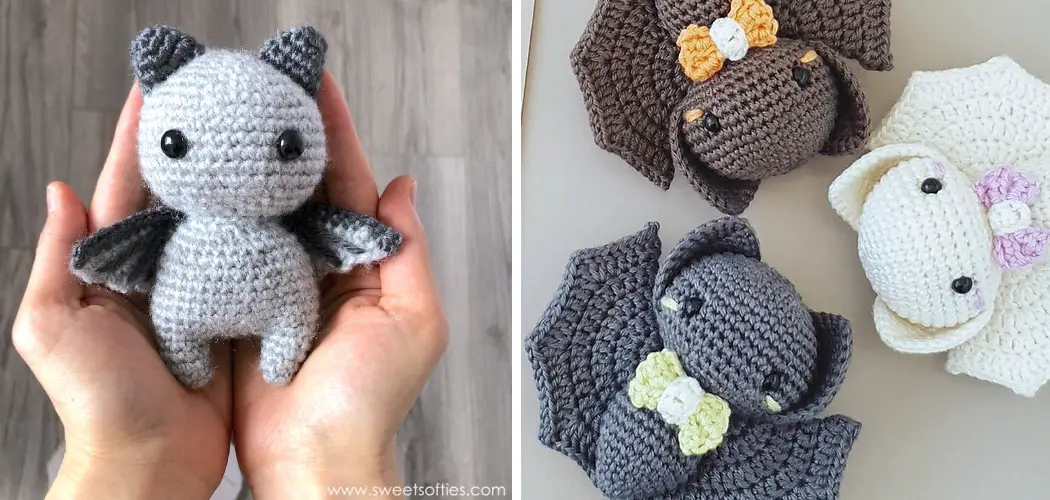
Do you want to make something fun and unique during your spare time? Have you ever wanted to express your creativity through crochet projects? Then why not give crocheting a bat a try?

With just a few supplies and basic techniques, anyone can create their own adorable critters. In this blog post, we’ll guide you step-by-step on how to crochet a bat for some extra Halloween décor or for everyday amusement. Let’s get started!
Needed Materials
Given below is a list of materials for crocheting the bat:
- Yarn (Preferably Black)
- Crochet Hook
- Needle
- Thread in a Matching Color as Your Yarn
- Polyester Fiber Fill, or Stuffing of Your Choice
- Scissors
11 Step-by-step Instructions on How to Crochet a Bat
Step 1: Make a Magic Ring
To make the body of your bat, you’ll need to start by making a magic ring. To do this, start with a loop of yarn and twist it once to create the look of a pretzel. Afterward, insert your crochet hook into the center of the twisted loop and grab the yarn that is connected to your ball.
Pull that strand through the center of your ring until you have 2 loops on your hook. You might need to adjust your ring after this step. It should be snug but not too tight. This is the beginning of your magic ring.

Step 2: Create a Chain
Now, yank your yarn through the back loop of your magic ring and create a chain stitch. This will form the foundation for all the other crochet stitches that you’ll need to make. It’s best to make 6 or 8 chain stitches as this will give you enough space to complete your project.
But feel free to make as many or as few stitches as you need for your bat. However, make sure to leave a tail of extra yarn at the end. It will come in handy later. It is also important to remember that a chain stitch has an uneven number of loops.
Step 3: Make a Single Crochet
Now, let’s begin the body of your bat by single crocheting into each stitch of your chain. To do this, insert your hook into the second chain from the hook and yank your yarn through. Afterward, create one loop on your hook and pull it through the other 2 loops on your hook.
Now, you’re done creating your first single crochet stitch! From here, single crochet into each chain stitch until you reach the end of your chain. Make sure to leave a tail of extra yarn at the end so that you can use it later.
Step 3: Make Single Crochet Stitches
Next, you’ll want to create single crochet stitches in each of the chains that you just made. To do this, insert your crochet hook into the second chain from your hook and grab the yarn. Pull that strand through the center of your stitch until you have 2 loops on your hook.

Then, yank your yarn through both loops to complete a single crochet stitch. Repeat these steps for every chain in your foundation row. You should have an even number of stitches in the end. Once you’ve finished creating your single crochet stitches, make sure to leave a tail of extra yarn at the end. This tail will come in handy later.
Step 4: Create More Rows
Once you’ve made your single crochet stitches, you’ll want to create more rows. To do this, insert your crochet hook into the first stitch of your foundation row and grab the yarn. Pull that strand through the center of your stitch until you have 2 loops on your hook.
Then, yank your yarn through both loops to complete another single crochet stitch. Continue making these stitches for as many rows as you want to make your bat bigger. It’s best to make at least 3-4 rows, but you can make up to 8 rows if you want.
Step 5: Make a Chain Stitch
Afterward, you can go ahead and make a chain stitch. To do this, grab the yarn and pull it through the last single crochet stitch that you just made. This will form the foundation for all your other stitches in this step. It’s best to make 6 or 8 chain stitches for your bat.
But feel free to make as many or as few stitches as you need. But make sure to leave a tail of extra yarn at the end. We’ll need it later. You should have an even number of stitches in the end. But do remember that a chain stitch has an uneven number of loops.
Step 6: Make a Half-Double Crochet Stitch
Now, you’ll want to make a half-double crochet stitch in each chain that you just made. To do this, insert your hook into the second chain from your hook and grab the yarn. Pull that strand through the center of your stitch until you have 3 loops on your hook. Then, yank your yarn through all 3 loops to complete a half-double crochet stitch. Repeat these steps for every chain in your foundation row.

Step 7: Make Half-Double Crochet Stitches in the Remaining Rows
Once you’ve made your first few rows of stitches, you’ll want to make half-double crochet stitches in the remaining rows. To do this, insert your hook into the first stitch of your foundation row and grab the yarn. Pull that strand through the center of your stitch until you have 3 loops on your hook.
Then, yank your yarn through all 3 loops to complete a half-double crochet stitch. Continue making these stitches for as many rows as you want to make your bat bigger.
Step 8: Make a Chain Stitch
Again, make another chain stitch. To do this, grab the yarn and pull it through the last half-double crochet stitch that you just made. This will form the foundation for all your other stitches in this step. But make sure to leave a tail of extra yarn at the end. We’ll need it later. You should have an even number of stitches in the end. But like before, do remember that a chain stitch has an uneven number of loops.
Step 9: Make a Double Crochet Stitch
Now, you’ll want to make a double crochet stitch in each chain that you just made. To do this, insert your hook into the second chain from your hook and grab the yarn. Pull that strand through the center of your stitch until you have 4 loops on your hook. Then, yank your yarn through all 4 loops to complete a double crochet stitch. Repeat these steps for every chain in your foundation row.
Step 10: Make Double Crochet Stitches in the Remaining Rows
Once you’ve made your first few rows of stitches, you’ll want to make double-crochet stitches in the remaining rows. To do this, insert your hook into the first stitch of your foundation row and grab the yarn. Pull that strand through the center of your stitch until you have 4 loops on your hook.

Then, yank your yarn through all 4 loops to complete a double crochet stitch. Continue making these stitches for as many rows as you want to make your bat bigger.
Step 11: Make Your Bat!
Now that you’ve completed the body of your bat, it’s time to assemble it. Before you start stuffing the body with polyester fiberfill or other stuffing material, make sure to sew together the opening at the bottom of your bat. Then, stuff the body of your bat and secure its shape using more thread in a matching color as your yarn.
Finally, make the eyes and ears of your bat by crocheting small circles or triangles, and attach them to the body using a needle and thread. And that’s it! You’ve successfully made a bat with crochet!
Following these instructions on how to crochet a bat, you can also make different kinds of bats with different colors and sizes. You can even experiment with different materials to create a unique creature that you can show off to your friends and family. So go ahead and get creative, and have fun crocheting your very own bat!
Do You Need to Use Professionals?
If you’re feeling a bit overwhelmed at the thought of crocheting a bat, don’t worry! You can always hire professional crochet experts to make your project for you. With their help, you’ll be able to get beautiful results in no time.

Plus, these professionals are experienced and knowledgeable about different techniques and materials so they can create a truly unique piece. So if you’re looking for some help with your project, don’t hesitate to get in touch with professionals to get the job done!
How Much Will It Cost?
The cost of getting a custom-made crochet bat will depend on the size and complexity of your project. Generally speaking, crochet experts usually charge based on the number of hours it takes them to complete the project as well as the type of materials used. So if you’re looking for an exact price, it’s best to get in touch with an expert to get an estimate. That way, you’ll be able to make sure that your project fits into your budget.
Tips and Tricks
If you want to become an expert in crocheting bats, here are some tips and tricks that experienced crocheters often use:
- Use Lightweight Yarn for Small Bats and Heavier Yarn for Bigger Bats.
- Use a Smaller Crochet Hook for Finer Details, and a Bigger One When You Need to Move Faster.
- When Crocheting the Body, Leave an Opening at the Bottom So That You Can Stuff It With Polyester Fiberfill or Other Stuffing Material.
- Use a Tapestry Needle to Sew on the Eyes and Ears, as Well as Any Other Details You Want to Add.
- If You Get Stuck While Crocheting Your Bat, Don’t Give Up! There Are Plenty of Online Tutorials Available That Can Help You
Frequently Asked Questions
Q: What Materials Do I Need to Crochet a Bat?
A: You will need yarn, a size H (5 mm) crochet hook, stuffing material such as polyester fiberfill, tapestry needle and thread for sewing the details. It is also recommended to use a stitch marker so you can easily keep track of your stitches.
Q: What Yarn Should I Use for Crocheting a Bat?
A: Lightweight yarn should be used for crocheting small bats, and heavier yarn if you’re making bigger bats. The type of yarn you choose will depend on the type of bat you’re making and the look that you want to achieve.
Q: What Size Crochet Hook Should I Use for Crocheting a Bat?
A: It is recommended to use a size H (5 mm) crochet hook when crocheting a bat. If you need to make finer details, you can switch to a smaller crochet hook. You can also use a bigger one when you need to move faster.
Q: How Should I Stuff My Bat?
A: Before stuffing your bat, make sure to leave an opening at the bottom so that you can stuff it with polyester fiberfill or other stuffing material. When stuffing your bat, make sure to do so evenly so that it has a nice shape. Once you’ve stuffed your bat, secure the shape using more thread in a matching color as your yarn.

Conclusion
So there you have it – a complete guide on how to crochet your very own bat! Now that you know the basics, why not give it a try? With practice, experimentation and the addition of your own personal touches, you can create crocheted critters of all kinds! Remember – nothing is too hard when it comes to making personalized pieces of art.
So let your imagination take flight and create some extraordinary crocheted bats today! Who knows? After a few tries, you might even find yourself creating something legendary! Thanks for reading this article on how to crochet a bat.