
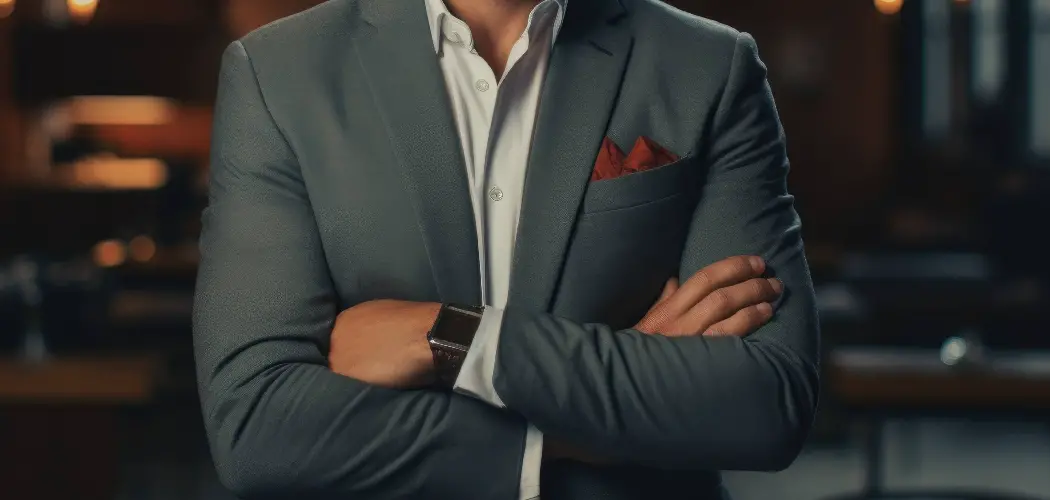
Are you wanting to give your wardrobe a fresh new look, but don’t know where to start? Nothing suffers from age faster than clothes – styles often come and go throughout the years. If you still hold on to those beloved blazers that have been in your closet for a while, fear no more!

You don’t have to be an expert seamstress and throw out all of your favorite pieces just yet; there are plenty of ways you can alter them without sewing. In this blog post on how to alter a blazer without sewing, we’ll show you how easy it is to customize and rejuvenate those classic blazers with nothing more than scissors — time for a DIY fashion makeover!
Necessary Materials
Before you start altering your blazer, make sure you have the following materials on hand:
- Scissors
- Fabric Glue or Iron-on Hem Tape
- Measuring Tape or Ruler
- Chalk or Fabric Marker
11 Step-by-step Guidelines on How to Alter a Blazer Without Sewing
Step 1: Measure and Mark
The first step to altering your blazer without sewing is to measure and mark where you want to make the necessary alterations. Use a measuring tape or ruler to make precise measurements, and then mark the areas with chalk or a fabric marker.

You can mark areas such as the sleeves, length, and waistline. It’s best to try on the blazer and make adjustments while wearing it, so you can see how the alterations will look in real time.
Step 2: Cut Along the Marks
Once you have marked all the necessary areas, use your scissors to cut along those marks. For example, if you want to shorten the sleeves of your blazer, cut them at the desired length. Make sure to cut along the seam lines for a clean finish. It’s always better to cut off less at first, as you can always go back and make further adjustments if needed. But once you’ve cut too much, there’s no going back.
Step 3: Hem the Cut Edges
After cutting along the marks, you may notice some frayed edges. To prevent this, use fabric glue or iron-on hem tape to seal off those raw edges. This will give your blazer a more professional and polished look without having to sew. It’s important to follow the instructions on the product you’re using and let it dry completely before moving on to the next step.
Step 4: Altering the Waistline
To alter the waistline of your blazer, first, try it on and determine how much you want to take in. Use pins or fabric clips to secure where you want to take in the waistline. Then, remove the blazer and glue or iron along the pins to secure the excess fabric in place. Let it dry completely before removing the clips and trying on your altered blazer. You may need to repeat this step a few times until you achieve the desired fit.

Step 5: Adding Darts
If you want a more fitted look, you can add darts at the back of your blazer. To do this, turn the blazer inside out and mark where you want to add the darts with chalk or fabric marker. Then, fold the fabric along that line and glue or iron in place. This will give your blazer a more structured look without having to sew.
But if you do know how to sew, you can also stitch the darts in place for a more permanent solution. This method works best for blazers that are made of non-stretchy fabrics.
Step 6: Adjusting the Length
To alter the length of your blazer, try it on and determine where you want it to hit. Use pins or fabric clips to mark that length, then take off the blazer and cut along those marks. Use fabric glue or iron-on hem tape to seal the cut edges and let it dry completely before wearing.
It’s always better to cut off less at first, as you can always go back and make further adjustments if needed. Heed caution when cutting your blazer, as you don’t want to end up with an unintentional crop top.
Step 7: Adding Patches
Patches are a great way to add some personality and interest to your blazer. You can either use pre-made patches or create your own by using fabric and iron-on adhesive. Simply cut the fabric into desired shapes and glue or iron them on. You can also add patches to cover up any imperfections or holes on your blazer.
But be careful not to overdo it – less is more in this case. It’s best to stick with one or two statement patches.
Step 8: Experiment with Collars
If you have a blazer with a traditional collar, you can easily change its style by experimenting with different collars. For example, you can add a detachable fur or faux-fur collar for a cozy and chic winter look. Or, you can use a fabric scarf to create a unique and eye-catching necktie collar. The possibilities are endless, so have fun with it!

Step 9: Accessorize with Brooches or Pins
Another easy way to alter the look of your blazer is by accessorizing it with brooches or pins. You can add them to the lapel or pockets of your blazer to give it a touch of personality and style. Plus, you can easily remove them if you want to switch up the look again.
It’s a quick and effortless way to elevate your blazer game. You can even use vintage brooches for a touch of nostalgia. It’s all about personalizing your blazer to make it unique and one-of-a-kind.
Step 10: Add Embellishments
Similar to adding patches, you can also add embellishments like rhinestones, studs, or beads to give your blazer a unique and personalized touch. You can use fabric glue or iron-on adhesive to attach the embellishments to any design you desire. Just make sure to let it dry completely before wearing it.
This is also a fun way to breathe new life into an old blazer. You can turn a plain and simple blazer into a statement piece with just a few added embellishments.
Step 11: Final Touches
Once you’ve completed all the necessary alterations, try on your blazer and make any final adjustments needed. You can also use a steamer or iron to smooth out any wrinkles or creases that may have occurred during the alteration process. Now, you have a fresh and updated blazer without sewing a single stitch! You can proudly rock your new look knowing that it’s uniquely yours and one-of-a-kind.

Following these simple steps on how to alter a blazer without sewing, you can successfully alter your blazer without having to sew. Whether you want to give an old blazer a new life or create a custom fit for a thrift find, this method is both easy and budget-friendly.
So next time you’re in need of a style update, keep these tips in mind and get creative with your blazers! Remember to always make precise measurements, be cautious when cutting, and have fun with adding personal touches. Happy altering!
Do You Need to Seek Professional Help?
If you’re not confident in your DIY skills or are dealing with a more complicated alteration, it’s always best to consult a professional tailor. They have the knowledge and experience to give you the perfect fit without any mishaps.
Plus, they can also advise you on what alterations will work best for your specific blazer. It may cost a bit more, but it’s worth it for a perfect fit and a flawless finish. However, with these simple steps, you can easily alter your blazer at home
without any sewing skills or expensive alterations. It’s a cost-effective and fun way to revamp your wardrobe and give new life to old pieces. So go ahead and get creative with altering your blazer the possibilities are endless!
How Much Could It Cost?
The cost of altering a blazer can vary depending on the complexity and intricacy of the alterations needed. Doing it yourself at home could save you money, as you won’t have to pay for professional services. But if you do decide to seek professional help, it’s best to get an estimate beforehand to avoid any surprises.
It’s also important to keep in mind that the cost of alterations may be worth it to give your blazer a perfect fit and updated look. So weigh your options and decide what works best for you and your budget. Happy altering!
Additional Tips
- Always Start With Small Alterations and Make Adjustments as Needed. It’s Easier to Take in More Fabric Than to Try and Fix the Mistake of Cutting Off Too Much.
- Be Careful When Using Fabric Glue or Iron-on Adhesive, as It Can Be Difficult to Remove if You Make a Mistake.
- Take Your Time and Double-check Your Measurements Before Making Any Cuts or Alterations. It’s Better to Be Safe Than Sorry!
- Experiment With Different Alterations and Techniques to Find What Works Best for You and Your Blazer. Don’t Be Afraid to Get Creative and Have Fun With It.
- Don’t Limit Yourself to Just Blazers – These Altering Techniques Can Also Be Applied to Other Pieces of Clothing, Such as Jackets or Coats. So Feel Free to Try Them Out on Different Garments! Overall, the Key is to Have Patience and Enjoy the Process of Transforming Your Blazer Into a Unique and Personalized Piece. Happy Altering! So go ahead and unleash your creativity and give new life to your blazers without ever picking up a needle and thread! You’ll be amazed at the transformation and proud of the skills you’ve acquired.

Frequently Asked Questions
Q: Can I Alter a Blazer That is Too Big or Small for Me?
A: Yes! With the techniques listed above, you can easily alter a blazer to fit your body shape and size. Just make sure to take accurate measurements and adjust accordingly. You can also use a blazer that fits you well as a guide for your alterations.
Q: What Alterations Can I Make Without Sewing?
A: There are plenty of alterations you can make without sewing, such as adjusting the length or width of sleeves, changing the buttons or adding patches, brooches, or embellishments. These simple techniques can give your blazer a whole new look without ever having to sew.
Q: Can I Alter the Length of My Blazer?
A: Yes, you can alter the length of your blazer to make it shorter or longer. Just make sure to measure and cut carefully and use fabric glue or iron-on adhesive for a clean finish.
Q: How Can I Make My Blazers Look More Professional?
A: You can make your blazers look more professional by adding a structured shoulder pad, removing any unnecessary details or embellishments, and ensuring a perfect fit. Also, opt for neutral colors or classic patterns to give off a polished and put-together look. So why not give it a try and see the difference it makes in your wardrobe?
Conclusion
Rather than let a blazer languish in the back of your closet, why not transform it into something new and exciting? It’s easier than you think – just follow these steps and gauge your creativity. And don’t forget: even if you don’t get the exact look you’re after, that doesn’t mean failure! Any alteration is art in motion.
So forget the rules, break open that needle-and-thread box, and make that blazer truly yours. After all, fashion is about self-expression, so experiment with different ideas until you find one that expresses you best. Thanks for reading this article on how to alter a blazer without sewing.