
Hello there, fellow craft enthusiasts! Are you ready to learn a new and exciting way to repurpose old tee shirts? If you love DIY projects and are always looking for environmentally friendly methods of creating new items, this blog post is perfect for you. Today, we will be discussing how to make tee shirt yarn, an innovative way to turn your old wardrobe staples into a versatile material that can be used for various crafts.

This step-by-step tutorial will teach you a fun new skill and encourage sustainable practices in your crafting journey. So grab those coffee-stained or ill-fitting tees from your closet, and let’s get creative with some upcycling magic! Get ready to discover the endless possibilities of tee shirt yarn in this post.
What Will You Need?
To make tee shirt yarn, you will need a few basic materials that you already have at home. These include:
- Old tee shirts (preferably made of cotton)
- Sharp scissors
- Ruler or measuring tape
That’s it! Simple and accessible supplies, right? Now, let’s move on to the steps involved in making tee shirt yarn.
8 Easy Steps on How to Make Tee Shirt Yarn
Step 1. Prepare Your Tee Shirt:
Start by flatting your tee shirt on a clean, hard surface such as a table or floor. Make sure there are no wrinkles or folds in the shirt. If necessary, iron the shirt to smoothen out any creases. This will help ensure that your cuts are neat and even, leading to high-quality tee shirt yarn. Remove any tags or stickers, as these can interfere with the yarn-making process.

Step 2. Cut off the Top and Bottom:
Using sharp scissors, make a horizontal cut right below the sleeves of the tee shirt to remove the top part. This should leave you with a rectangular piece of fabric. Next, cut off the bottom hem of the shirt as well. Now, you are left with a tube of fabric that is ready to be transformed into tee shirt yarn. Make sure all your cuts are straight and smooth, as jagged or uneven cuts can affect the final look of your yarn.
Step 3. Make Horizontal Cuts:
Lay your fabric tube flat and cut horizontal strips from one end to the other. The width of the stripes will determine the thickness of your tee shirt yarn, but a good starting point is typically between 1 and 2 inches. However, cut only some of the way through to the other side. Leave an uncut section about an inch wide on the far side to hold the strips together. When you’re done, you should have a series of loops connected by the uncut section. This might seem strange now, but it’s crucial to creating one continuous strand of yarn from your tee shirt.
Step 4. Cut Diagonally to Create a Continuous Strand:
Now comes the fun part – transforming the loops into a continuous strand of tee shirt yarn. To do this, unfold your fabric so the uncut section is visible. Start at the bottom of the uncut section and make a diagonal cut to the top of the first slit on the opposite side.

You are connecting the bottom of one loop to the top of the next loop. Continue this process of cutting diagonally across the uncut section, always from the bottom of one circle to the top of the next. When you reach the last loop, cut the remaining fabric straight across to free the end. You should now have a single, long strand of tee shirt yarn.
Step 5. Stretch and Roll The Yarn:
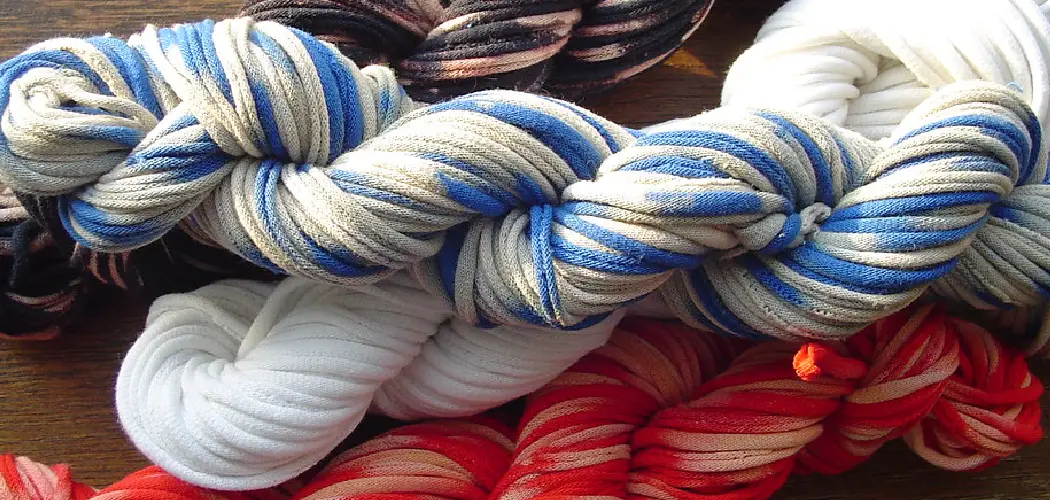
Now take your long strand of tee shirt yarn and gently pull it from one end to the other. This will cause the fabric to curl in on itself, creating a more yarn-like texture and appearance. After you’ve stretched the entire piece of yarn, roll it up into a ball for easy storage and use. Make sure to roll it loosely to prevent any tangles or knots. Congratulations, you have successfully made your tee shirt yarn! Now, you can use this versatile material in various craft projects, from knitting and crochet to weaving and macrame.
Step 6. Create Your Crafts:
Now that you’ve made your tee shirt yarn, it’s time to get creative! You can use this versatile material for a wide variety of craft projects. The possibilities are endless, from crocheting a colorful rug, and knitting a cozy blanket to weaving a stylish tote bag. If you are a beginner, start with simple projects like bracelets or headbands and gradually move on to more complex ones. Remember, the key to any craft project is patience and practice.
Step 7. Care and Maintenance:
To keep your tee shirt yarn in good condition, taking care of it properly is crucial. Store it in a cool, dry place free from moisture and direct sunlight. If you need to clean items made from your yarn, hand-washing them in cold water with a mild detergent is generally safe. However, remember that this yarn is made from t-shirt material so it may shrink or fade over time, just like a regular tee shirt. Always air-dry your projects to maintain their shape and size. Regular care and maintenance will ensure your tee shirt yarn crafts stay looking fresh and vibrant for longer.

Step 8. Share and Inspire:
After completing your crafts made from tee shirt yarn, remember to share your creations! Inspire others by posting your projects on social media or in craft groups. This allows you to showcase your handy work and encourages more people to upcycle their old tee shirts and participate in sustainable crafting. You can even gift your unique, homemade creations to friends and family, further spreading the joy of sustainable crafting. Remember, each piece of tee shirt yarn you make represents a personal creative achievement and a step toward a more environmentally friendly world.
By following these eight simple steps, you can easily make your own tee shirt yarn and explore the endless possibilities of sustainable crafting. So go ahead, grab some old tee shirts, and start creating!
5 Additional Tips and Tricks
Tip 1. Choose The Right Shirt:
While you can make yarn from any tee shirt, those made from 100% cotton work best. They produce a softer, more flexible yarn that’s easier to work with. Avoid shirts with lots of seams, decorations, or prints, as these can interfere with the yarn-making process.
Tip 2. Experiment with Colors and Patterns:
Don’t limit yourself to plain tee shirts. Striped shirts can produce interesting patterns, while tie-dyed or multicolored shirts can create unique, vibrant yarn. Mix and match different shirts for a truly one-of-a-kind project.
Tip 3. Sharp Scissors are Key:
A sharp pair of scissors makes cutting the tee shirt easier and ensures your cuts are clean and even. This contributes to the overall quality of your yarn, so it’s worth investing in a good pair if you plan on making a lot of tee shirt yarn.
Tip 4. Adjust the Width for Different Projects:
The width of your strips can significantly affect the look and feel of your finished project. Thinner strips (around 1 inch wide) are great for delicate projects like jewelry, while thicker strips (2 inches or more) work well for chunky knit or crochet items.
Tip 5. Practice Makes Perfect:
Your first few attempts at making tee shirt yarn might not be perfect, and that’s okay! The more you practice, the better you’ll get. Experiment with different techniques and materials until you find what works best.
With these additional tips and tricks, you are now well-equipped to start your journey into the world of sustainable crafting with tee shirt yarn.

5 Things You Should Avoid
Avoid 1. Using Shirts with Stains or Damage:
Even though you are upcycling, try to avoid using t-shirts with stains, holes, or other damage. These imperfections can weaken your yarn and affect the quality of your finished project.
Avoid 2. Cutting Too Fast:
Rushing through the cutting process can lead to uneven widths or accidental cuts into the uncut section of the shirt. These mistakes will disrupt the continuous strand of yarn you’re trying to create.
Avoid 3. Neglecting to Stretch the Yarn:
You might need to stretch the yarn strip after cutting it to leave you with a flat ribbon instead of a round yarn. Take the time to pull the fabric so it curls onto itself and forms a proper yarn.
Avoid 4. Using Shirts with Heavy Prints:
While printed shirts can add some interesting visual elements to your yarn, heavily printed areas can be thick and inflexible, making cutting and stretching into yarn difficult.
Avoid 5. Storing in Damp Areas:
Storing your tee shirt yarn in damp or humid areas can lead to mildew and color fading. Keep your yarn in an excellent, dry spot to preserve its condition and longevity.
By avoiding these common mistakes, you can ensure a smooth and successful yarn-making process.
Conclusion
In conclusion, how to make tee shirt yarn is not only a fun and creative activity, but it also has so many practical uses! From crochet projects and macramé wall hangings to sustainable household items and unique gift wrapping, there’s no limit to what you can create with this eco-friendly material. And the best part? You can easily find materials in your closet or at thrift stores, making it an affordable and sustainable option.
So why not give it a try? Take some old T-shirts and transform them into something new, beautiful, and valuable. Share your creations on social media using the hashtag #TShirtYarnDIY to inspire others to join the fun!
Let’s keep the creativity flowing while also reducing our environmental impact. Together, we can make a difference one t-shirt at a time. Now go grab those scissors and start snipping away – your next project awaits!
Expertise:
Crafting expert with a focus on innovative techniques and diverse materials.
Specialization:
- Textile arts (weaving, embroidery, and fabric dyeing)
- Woodworking and furniture design
- Mixed media and upcycling projects
Recognition:
- Featured in local art exhibits showcasing innovative craft projects
- Collaborated with community organizations to promote crafting workshops
- Received accolades for contributions to sustainable crafting initiatives
Mission:
- To inspire and empower crafters of all levels to discover their creative potential
- Encourages experimentation and self-expression through hands-on projects