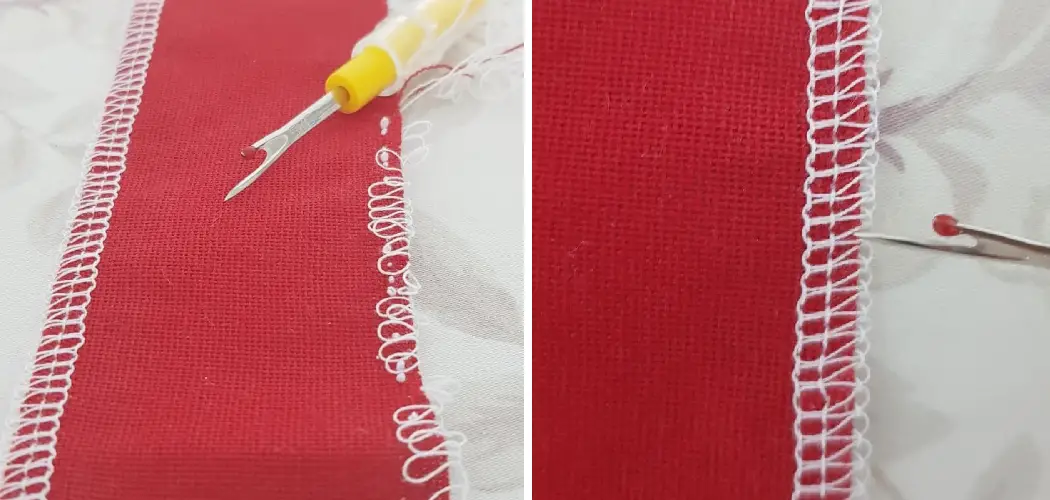
Are you looking for a way to take your sewing projects up a notch? Maybe you want to add some professional-looking embellishments, or just make sure your seams stay secure through the wash and wear.
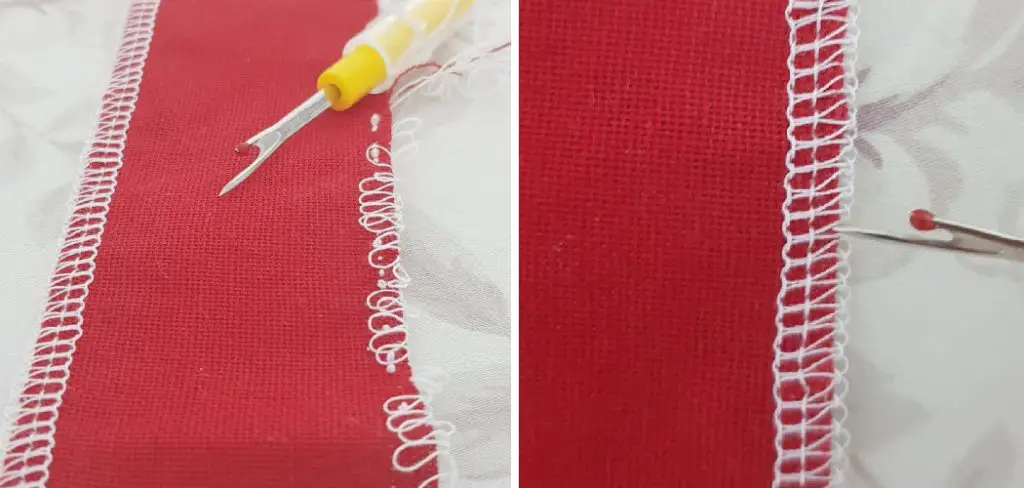
If so, you’ll definitely want to learn how to use the serger stitch! This powerful technique is one of many ways sewers can give their garments an extra finesse that will last years.Not only does it create strong reinforced seams on delicate fabrics like polyester and lycra, but with a few simple adjustments, it’s possible to make those stitches even smaller and more precise – perfect for adding that stylish look without compromising durability.
In today’s blog post on how to make serger stitch smaller we’re exploring all the different ways of making your serger stitch smaller so crocheting experts can unleash their true creative potential!
Why Might You Want to Make Your Serger Stitch Smaller?
First things first, let’s talk about why you might want your serger stitch to be smaller. It all comes down to what kind of garment you’re sewing or how you want it to look and feel once it’s finished.
- If You’re Making a Lightweight Blouse, Using a Smaller Serger Stitch Will Help Ensure a Neat and Polished Look Without Adding Too Much Bulk to the Seams.
- For Stretchy Fabrics, Like Activewear or Swimwear, Making a Smaller Serger Stitch Will Keep the Fabric From Stretching Out and Losing Its Shape Over Time.
- If You’re Working on Delicate or Intricate Designs, a Smaller Serger Stitch Will Allow for More Precision and Detail.
Overall, knowing how to make your serger stitch smaller gives you more control over the finished look and durability of your garment.
10 Step-by-step Guidelines on How to Make Serger Stitch Smaller
Step 1: Choose the Right Needle and Thread
To start, you’ll want to make sure you have a needle that’s appropriate for your fabric. A sharp needle is best for woven fabrics, while a ballpoint needle is better for knits. Additionally, using a thinner thread can help create smaller stitches. it’s important to keep in mind that the thread and needle should work together to produce a balanced stitch.

Step 2: Choose the Right Stitch Length
The length of your serger stitch will determine how small or large it is. For smaller stitches, use a shorter stitch length. This will also help prevent the fabric from puckering or stretching out. it’s recommended to start with a stitch length of 2 or 3 and adjust from there. You can always make the stitch longer if needed, but it’s harder to make it smaller once it’s already sewn. But, for finer sewing and more delicate fabric, it’s best to keep the stitch length as small as possible.
Step 3: Adjust the Differential Feed
The differential feed controls how much fabric is fed through the machine. By adjusting this, you can create a tighter or looser stitch. For smaller stitches, decrease the differential feed to 0.7 or lower. This will prevent the fabric from stretching out and create a more precise stitch. It’s important to note that adjusting the differential feed can also affect the appearance of your serger stitch, so be sure to test it out on a scrap piece of fabric first.
Step 4: Check Tension Settings
Make sure your serger’s tension settings are balanced. Having too much tension can cause the stitches to pull and pucker, making them appear larger. It’s best to start with a balanced tension and make small adjustments as needed. But, for smaller stitches, you may need to slightly decrease the tension. You can also experiment with using a differential tension, where the tensions on the upper and lower loopers are different.
Step 5: Use an Appropriate Stitch Type
Different serger stitches have different effects on fabric. For smaller stitches, consider using a rolled hem or a flatlock stitch. These stitches are tighter and more compact, making them great for creating small, neat stitches. However, keep in mind that not all sergers have these stitch options, so make sure to check your machine’s manual before attempting. You can also experiment with using a double needle for a smaller serger stitch.
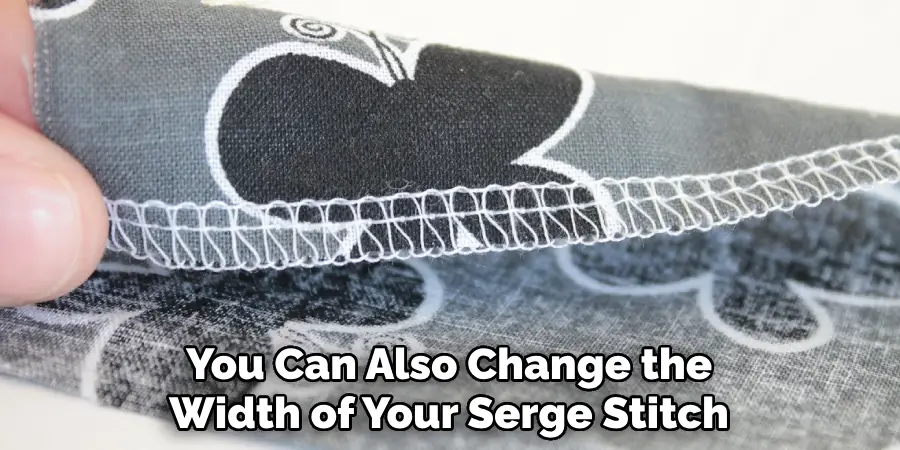
Step 6: Adjust the Stitch Width
In addition to adjusting the stitch length, you can also change the width of your serge stitch. For smaller stitches, decrease the width to create a tighter and more precise stitch. Keep in mind that this may also affect the appearance of your stitch, so be sure to test it out before sewing on your actual project.
It’s also worth noting that not all sergers have the option to adjust stitch width, so refer to your manual or experiment to see if yours does.
Step 7: Use a Smaller Cutting Width
The cutting width determines how much of the fabric gets trimmed off as you serge. By using a smaller cutting width, you can make your stitches appear smaller and more compact. This is especially useful for delicate or lightweight fabrics that may fray easily with a larger cutting width. This feature is not available on all sergers, so be sure to check if your machine has this option.
Step 8: Change the Blade
Some sergers have multiple blades that can be interchanged for different types of stitches. By changing the blade to a smaller one, you can create smaller and more precise stitches. Refer to your machine’s manual for instructions on how to change the blade.
It’s also important to note that not all sergers have interchangeable blades, so if yours does not, you can skip this step. You can also experiment with using a different type of blade, such as a rotary cutter, to create smaller stitches.
Step 9: Use a Serger Foot with a Smaller Hole
The size of the foot on your serger can also affect the size of your stitch. By using a foot with a smaller hole, you can create a tighter and more precise stitch. This is especially useful for sewing on delicate or lightweight fabrics, as it helps prevent the fabric from getting pulled into the machine while stitching.
Not all sergers have interchangeable feet, so make sure to check before attempting this step. But, if yours does, you can purchase different foot attachments to use for smaller stitches.
Step 10: Practice and Make Adjustments as Needed
As with any sewing technique, practice makes perfect. Sewing on scrap fabric first will allow you to make adjustments and see the effects before stitching on your actual project. Don’t be afraid to experiment with different settings and techniques to achieve the desired result. And remember, making smaller serger stitches takes time and patience, so don’t get discouraged if it doesn’t come out perfectly on your first try.
Following these steps on how to make serger stitch smaller can help you achieve smaller and more precise serger stitches for a professional-looking finish on your projects. However, it’s important to note that every machine is different and may require slight adjustments or techniques specific to its make and model. So, don’t be afraid to refer to your machine’s manual or experiment with different settings until you find what works best for you.
Frequently Asked Questions
Q: What if My Serger Doesn’t Have the Option to Adjust Stitch Width or Use Different Blades?
A: Not all sergers have these features, so don’t worry. You can still achieve smaller stitches by adjusting the other settings and techniques mentioned in this guide. It may just take a bit more practice and experimentation.
Q: Can I Use These Techniques on All Types of Fabric?
A: Yes, these techniques can be used on most types of fabric. However, some fabrics may require different adjustments or techniques to achieve the desired result. For example, very lightweight or delicate fabrics may need a smaller stitch length and tension than heavier fabrics. It’s always best to test on scrap fabric first before sewing on your actual project.
Q: Can I Use These Techniques for Other Types of Stitches?
A: Yes, these techniques can also be used for other types of stitches, such as a cover stitch or chain stitch. Just make sure to refer to your machine’s manual and experiment with different settings until you achieve the desired result. So, with some practice and patience, you can easily make your serger stitches smaller and more precise, giving your sewing projects a professional finish.
Conclusion
It is possible to make serger stitch smaller and refine your project’s look in the process. With a few simple steps, you can master the techniques of altering serger stitch configurations easily and quickly. First, adjust the number of threads used for a particular stitch. Experiment with different thread tensions as well as knife blade settings to find the most suitable combination.
Lastly, on how to make serger stitch smaller, make sure to test your adjustments on fabric scraps before committing them to your main project. You’ll be amazed at how staggering improvement these tweaks make! By taking control of configuration options like this, you can create astonishing projects with outstanding results. So don’t wait any longer, start making those stitches smaller today and unleash your creativity!

