
Are you ready to start crafting something unique and one-of-a-kind? Paperweights are the perfect project if you’re looking for a creative way to express yourself. Not only are they fun to make, but they also serve as stylish decorations for any room!

With just a few simple materials and tools, you can create an eye-catching decorative item that will provide both form and function. Making your own paperweight doesn’t require expensive or specialized equipment: with some time and patience, anyone can master this craftsman skill.
In this blog post, we’ll walk through the basics of how to make paper weight—everything from picking out the perfect design to finishing touches at the end. Read on for tips on bringing life into an ordinary piece of paper!
What Will You Need?
To get started, you’ll need a few basic materials:
- Paper or cardstock
- Scissors
- Glue (preferably craft glue for stronger holds)
- Decorative elements (beads, glitter, stickers, etc.)
Once you have these supplies, it’s time to get creative!
10 Easy Steps on How to Make Paper Weight
Step 1. Collect Materials
The first step in making a paperweight is to collect the necessary materials. You will need some type of clear or colored glass, such as a jar or vase, as well as a flat object that can be used as the base for the paperweight. Use some decorative items, such as beads or stones, to add an extra touch of personality to your paperweight. Once you have all the materials you need, you are ready to begin crafting your paperweight.

Step 2. Cut and Shape Glass
Next, you will need to cut and shape the glass into the desired shape for your paperweight. If you are using a jar or vase, you can remove the lid and then use a glass cutter to cut off any excess material from around the edges of the jar or vase. If you are using a flat piece of glass, you can use a grinder or saw to cut it into whatever shape you desire. Once your glass is cut and shaped, it is time to move on to the next step in creating your paperweight.
Step 3. Assemble Paperweight
Now that your materials are ready, it is time to assemble your paperweight. Begin by placing the flat object on top of the glass and then add any decorative items you want to include in your design. Once everything is in place, carefully glue all the pieces with a strong adhesive such as super glue or epoxy resin. Allow plenty of time to dry before moving on to the final step in making your paperweight.
Step 4. Seal Paperweight
Finally, once everything has dried completely, you must seal your paperweight with a clear sealant such as polyurethane or lacquer spray paint in order to protect it from damage over time. Apply two coats of sealant and allow ample time to dry before displaying your beautiful new paperweight!
Step 5. Enjoy Your New Paperweight
Now that you have completed your paperweight, it’s time to enjoy it! Find a prime spot in your office, living area, or wherever you want to display it. One of the great things about making your own paperweight is that it’s unique to you, reflecting your taste and creativity.
With care and maintenance, your handmade paperweight can be a long-lasting decoration and conversation piece. Remember, the joy of crafting is in the process as much as in the result. So, if you’ve enjoyed this project, don’t hesitate to explore other DIY crafts!

Step 6. Maintenance and Care for Your Paperweight
After enjoying your handmade paperweight for some time, it may gather dust or lose a bit of its shine. Don’t worry! With careful maintenance, your paperweight can stay looking as good as new. Regularly clean it gently with a soft cloth, careful not to scratch the surface.
If your paperweight has a lot of decorative elements or intricate parts, consider using a soft brush to get into the crevices. Always handle it with care to avoid any accidental drops. Remember, your paperweight isn’t just a functional object; it’s a work of art that deserves to be treasured!
Step 7. Sharing Your Craft
After you’ve created your paperweight, why not share your crafting journey with others? You can post photos of your handmade paperweight on social media, showing off your unique design and inspiring others to embark on their DIY projects.
Bring your paperweight to your next meet-up if you’re part of a craft group. Seeing your completed project might give others some creative ideas. Always remember, part of the fun of crafting is sharing your creations and spreading the joy of making something beautiful with your hands.
Step 8. Exploring Further
If you enjoyed making a paperweight and have caught the crafting bug, why not explore further? There are countless other DIY projects that you could tackle. For instance, you could try making your own candles, creating homemade soap, or even knitting a scarf. You could also experiment with different designs and materials in making your next paperweight.

Consider using resin and clay or even incorporating small figurines or photos for a more personal touch. The possibilities are only limited by your imagination. Remember, the joy of crafting lies not only in the result but also in the process of creating. So go ahead, let your creativity flow, and embark on your next crafting adventure!
Step 9. Teaching Others
If you found creating your paperweight rewarding, consider sharing your newfound skill with others. Hosting a DIY paperweight workshop at your local community center, school, or even at home with friends is a great way to spread the joy of crafting.
Prepare a list of needed materials and a step-by-step guide based on your experience. Remember to share your tips and tricks, and encourage participants to express their creativity. Teaching others not only helps them learn a new skill but also enriches their own crafting experience.
Step 10. Reflect and Improve
After you’ve created your paperweight, taught others, and enjoyed it for a while, take a moment to reflect on the process. Did you face any challenges? Were there steps that you found particularly enjoyable? Use this reflection to improve your future crafting projects.
Perhaps there were techniques that you could polish, or there were materials that you’d like to explore further in your next project. Crafting is a journey of continual learning and improvement, so keep experimenting, creating, and, most importantly, enjoying the process!
By following these steps, you can easily create your unique paperweight that will be functional and serve as a beautiful decoration. With proper maintenance and care, it can last for years to come.

5 Additional Tips and Tricks
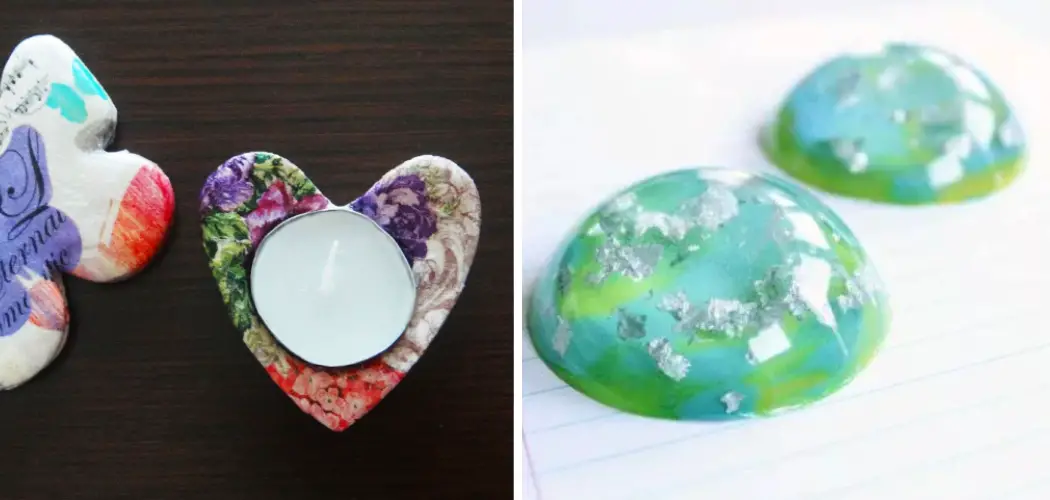
- Experiment with Colors and Textures: Be bold and play around with different colors and textures when choosing your decorative items. This will give your paperweight a unique and personal touch. You could even match the color scheme to the décor of the room where you plan to display it!
- Recycle Old Objects: Making a paperweight is an excellent opportunity to repurpose old items. Old jewelry, shells picked up on the beach, or even small toys can make beautiful additions to your design.
- Personalize Your Paperweight: Consider adding a personalized touch to your paperweight. You could use a small photograph or a piece of fabric from a memorable event or write or paint something on the bottom. This can turn your paperweight into a sentimental keepsake.
- Think Safety First: Always remember to prioritize safety when crafting. Use protective gloves when handling sharp objects or adhesives, and work in a well-ventilated space when using substances like paint or sealant.
- Gift a Paperweight: A homemade paperweight is a thoughtful and unique gift. Consider making one for a loved one. It’s a creative way to express your care and appreciation for them.
With these tips and tricks, you are now ready to create your own beautiful paperweight. Remember to enjoy the process and let your creativity shine!
5 Things You Should Avoid
- Avoid Rushing Through the Process: Crafting requires patience and time. Rushing through the process may lead to mistakes or a final product that aligns differently from your initial vision. Take your time at each step to ensure quality results.
- Avoid Skipping Safety Measures: As mentioned earlier, safety should always be a priority while crafting. Do not skip wearing protective gloves or working in a well-ventilated space when required.
- Avoid Using Unfit Materials: Only some material is suitable for some projects. Choosing materials that can’t withstand the weight or are not durable enough could result in a fragile paperweight. Always consider the durability and appropriateness of your materials.
- Avoid Overcrowding Your Design: While using all your favorite items in your paperweight is tempting, overcrowding your design can make it look chaotic and detract from the beauty of individual pieces. Less is often more when it comes to design.
- Avoid Neglecting Maintenance: Your paperweight might require occasional cleaning to keep it looking its best. This maintenance must be revised to avoid dullness or damage over time. Remember to keep your paperweight clean and well-maintained.
By avoiding these mistakes, you can ensure a smooth and enjoyable crafting experience that results in a beautiful and durable paperweight.
Conclusion
Crafting your paperweight can be a delightfully fulfilling experience! Whether you find a creative way to repurpose an everyday object or prefer to start from scratch and create something entirely novel, you can’t go wrong with the satisfaction of making something with your own two hands.
Hopefully, this guide on how to make paper weight has given you the necessary steps and tips to make your very own unique paperweight. Remember to have fun, stay safe, and let your creativity flow.
With these tried-and-true tips, you can make the perfect paper weight for any setting. So grab some supplies and get creative! Who knows what treasured addition you’ll bring into this world? You might even inspire others to give it a go and enjoy the incredible process of DIY crafting. Good luck, and happy creating!