
“Do you ever feel like wearing a dress is an impossible task? You love the overall look, but it’s simply too tight at the bust area and no matter what dieting and exercise plan you try, nothing seems to work! This can be incredibly frustrating. But don’t worry; there are ways to make even the tightest of dresses fit your figure in all the right places.

In this blog post on how to make dress bigger at bust, we will take a look at how you can make any dress bigger at the bust without having to buy a larger size—an easy way for everyone to find their perfect fit.”
Why Do Dresses Often Fit Poorly in the Bust Area?
This is a common problem for many women, as our body shapes and sizes can vary greatly. Oftentimes, dresses are designed with a standard bust size in mind, which may not be suitable for everyone. This can lead to dresses being too tight or too loose at the bust area, causing discomfort and a less-than-flattering fit.
It’s important to remember that it’s not your body that needs to change, but the dress itself. By following these simple steps, you can easily make your dress bigger at the bust and feel confident and comfortable in any outfit.
Why It is Necessary to Make the Dress Bigger at the Bust?
Comfort:
Wearing a dress that is too tight at the bust can cause discomfort and restrict movement. No one wants to spend their day constantly adjusting and pulling at their dress. Making the dress bigger at the bust will ensure a comfortable fit, allowing you to move freely and confidently throughout your day.
Better Fit:
A well-fitting dress can do wonders for your overall appearance. By making the dress bigger at the bust, you can achieve a better fit that flatters your figure and enhances your curves. This will not only make you look great but also boost your confidence.
Avoid Alterations:
Getting a dress tailored to fit your bust can be time-consuming and expensive. By learning how to make the dress bigger at the bust, you can save yourself the hassle of alterations and have a perfectly fitting dress in no time.

What You Will Need
To make your dress bigger at the bust, here are some items you will need:
- Needle and Thread or Sewing Machine
- Extra Fabric (Matching or Complementary Color)
- Fabric Scissors
- Pins
- Measuring Tape
- Iron and Ironing Board (Optional)
11 Step-by-step Guidelines on How to Make Dress Bigger at Bust
Step 1: Try on the Dress
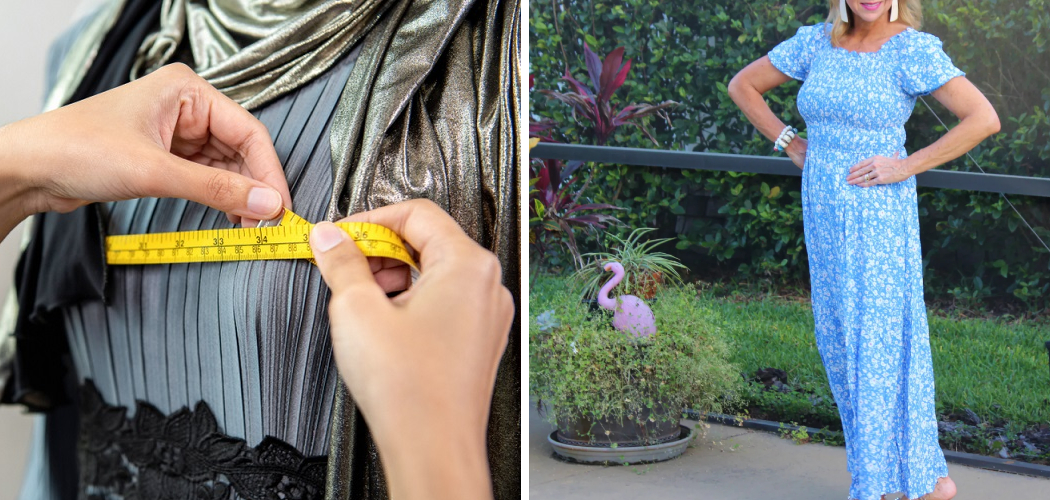
Before beginning any alterations, it is important to try on the dress and assess the areas that need to be made bigger. Make sure to wear a supportive bra that you would normally wear with the dress. Otherwise, the fit may not be accurate. You can also take measurements of your bust area to compare with the dress’s measurements. That way, you can determine how much bigger the dress needs to be at the bust.

Step 2: Measure and Mark
Using a measuring tape, measure the distance between your bust points (the fullest part of your bust). Then on the dress, mark this same measurement from each side seam. This will indicate how much extra fabric you will need to add on both sides of the bust area. But don’t cut or add fabric just yet. You want to make sure the dress fits well in other areas before making any alterations.
Step 3: Prepare the Extra Fabric
Using your extra fabric, cut two rectangles that are slightly larger than the marked measurements on the dress. Make sure the fabric matches or complements the dress in color and texture. You may also choose to use a stretchy fabric, which will allow for more flexibility. It is important to use the same type of fabric as the dress for a seamless look. But if that’s not possible, choose a similar fabric that will blend well.
Step 4: Pin the Fabric
Lay the dress flat on a table with the front facing up, and place one of the extra fabric rectangles over the marked area on one side of the dress. Pin it in place, making sure not to pull or stretch the fabric. Repeat on the other side. It is important to have even and smooth fabric when pinning. However, if the dress is too tight at the waist or hips, you can make adjustments to fit your body shape.
Step 5: Sew the Fabric
Using a needle and thread or sewing machine, sew along the pinned edges of the fabric, attaching it to the dress. Be sure to sew close to the edge and in a straight line for a clean finish. You can also use an iron to press down the seams for better adhesion. It is important to sew only on the marked area and not onto the dress’s other parts. You may also choose to use a zigzag stitch for added stretch and movement.
Step 6: Try on the Dress Again
After sewing, try on the dress again to see if the fit at the bust has improved. If it still feels tight, you may need to repeat the previous steps with more fabric. You can also make adjustments by using a larger seam allowance or cutting off any excess fabric. But remember to try on the dress again after every alteration. It’s always better to take it slow and make sure the dress fits perfectly rather than rushing and ending up with a poorly fitting outfit.

Step 7: Cut off Excess Fabric
If the extra fabric is too bulky or noticeable, you can trim off any excess fabric from the inside of the dress. This will also help to prevent fraying and improve comfort. You can also finish the edges with a serger or zigzag stitch to keep the fabric from unraveling. But if you are using a stretchy fabric, this step may not be necessary. If you are satisfied with the fit at this point, move on to the next step.
Step 8: Make Adjustments to Other Parts of the Dress
Sometimes, making alterations to one part of the dress may affect its overall fit. If you find that the waist or hips feel too tight after adding fabric to the bust area, make adjustments accordingly. You can also take in the sides of the dress to achieve a more fitted look. But make sure not to take in too much, as it may cause discomfort or restrict movement.
Step 9: Add Darts
If your dress has a structured bust area, you can add darts on each side to create more room for your bust. To do this, mark the dart points on the dress and sew along the marked lines, tapering towards the bust point. Then press down the dart with an iron to give it a clean finish. This will provide extra space for your bust while maintaining a flattering silhouette. It is also a great alternative for dresses with little to no stretch.
Step 10: Finish the Edges
After all alterations have been made, it’s time to finish the edges for a professional look. You can use a serger or zigzag stitch along the raw edges of the fabric to prevent fraying. If you are using a thick or bulky fabric, you can also trim the edges with pinking shears for a neat finish. And if you prefer, you can fold and hem the edges for a more polished look. However, this step may not be necessary if the fabric and alterations are minimal.

Step 11: Rock Your New Dress!
Congratulations! You have successfully made your dress bigger at the bust to fit your body shape comfortably. Now it’s time to show off your new outfit and feel confident in a dress that flatters you perfectly. Remember to take your time and make adjustments as needed, and always try on the dress after each alteration for the best results.
Always keep in mind that the most important thing is to feel comfortable and confident in what you wear. If you feel good, you’ll look good! So go ahead and rock your new dress with pride.
Following these steps, you can also make alterations to other areas of the dress such as the waist, hips, or sleeves. The key is to take measurements, mark and pin fabric accordingly, and make adjustments gradually until you achieve a perfect fit. With some time and patience, you can transform any ill-fitting dress into your new favorite outfit.
Frequently Asked Questions
Q: Can I Use Any Type of Fabric for This Alteration?
A: For the best results, it is recommended to use the same type of fabric as the dress. However, if that’s not possible, choose a similar fabric that will blend well. You can also use stretchy fabrics for more flexibility. Just make sure to use the same type of fabric for both sides of the dress for a seamless look.
Q: Can I Make My Dress Smaller Using This Method?
A: This alteration method is specifically for making a dress bigger at the bust. If you want to make your dress smaller, it is recommended to consult a professional tailor or seamstress who can make the proper adjustments for your specific needs.
Q: Is It Necessary to Use a Sewing Machine?
A: No, you can also do this alteration by hand using a needle and thread. However, using a sewing machine will ensure a cleaner and more secure finish. If you don’t have access to a sewing machine, consider borrowing one from a friend or family member or renting one from a local craft store.

Conclusion
In conclusion, learning how to make dress bigger at bust has a few simple and helpful tips. It might seem intimidating at first, but with the right tools and knowledge, it can be a simple project to undertake. Don’t be afraid to experiment, practice these techniques – in the end, you will feel confident that you now know about it.
With a bit of creativity, you will have discovered new ways in which even near-disasters become fashion successes. So take out your pattern paper and sewing machine and get started today! Who knows? You could be the next glamorous fashionista.