
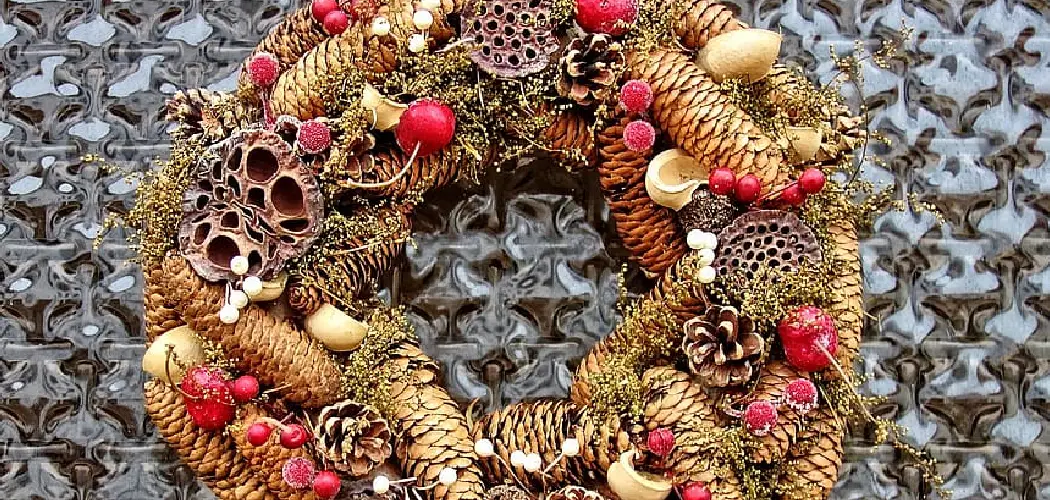
Are you looking for a fun and creative way to decorate your home this fall? Check out how to make an Acorn Wreath! This craft project is budget-friendly and easy, taking no more than two hours to complete. Plus, it makes the perfect addition to any autumnal décor.
Acorn wreath making involves simple steps and materials like acorns, grapevine wreath forms, and hot glue. This beginner-friendly DIY project is perfect for families with children or wanting to add a personal touch to their home décor.

With these simple steps on how to make acorn wreath you can create a rustic wreath that celebrates all things seasonal, from nuts, twigs, and leaves. Who knows – maybe as the seasons change, so will your wreath! So dust off that hot glue gun and prepare for some DIY acorn-filled fun.
What Will You Need?
Before you get started, make sure to gather the following materials:
- Acorns (gathered from nature or purchased)
- Grapevine wreath form
- Hot glue gun and glue sticks
- Twine or ribbon for hanging
Once you have all your materials, it’s time to get crafting!
10 Easy Steps on How to Make Acorn Wreath
Step 1: Gather Acorns
The first step in making an acorn wreath is collecting your primary material – acorns! If you have oak trees in your neighborhood, take a walk and gather fallen acorns. Try to manage a variety of sizes and colors for a more visually exciting wreath.
Step 2: Clean and Dry Acorns
Once you’ve gathered enough acorns, it’s time to prep them for your wreath. Start by cleaning the acorns. Remove any dirt or debris using a soft brush or damp cloth. After cleaning, it’s essential to let the acorns dry thoroughly to prevent any mold or decay. You can let them air dry naturally or, for a quicker result, place them on a baking sheet in a low-temperature oven. Just be sure to keep an eye on them to avoid any accidental roasting! Once completely dry, they are ready to be used in your wreath.

Step 3: Arrange the Acorns
Start arranging the acorns on your grapevine wreath form. There’s no right or wrong way to do this – it all comes down to personal preference. You can create patterns with your acorns or opt for a more random arrangement. Once you’re satisfied with how they look, start gluing them one by one using the hot glue gun. Hold each acorn in place for a few seconds to ensure the glue sets. It’s a good idea to start with the larger acorns and fill in the gaps with smaller ones.
Step 4: Fill in the Gaps
After you’ve secured all the large acorns, look at your wreath. You’ll likely notice some gaps between the acorns. These gaps can be filled with smaller acorns. Apply glue to the smaller acorns and insert them into the spaces. They not only fill in the gaps but also add depth and dimension to your wreath. Ensure the glue is set correctly before moving on to the next step.
Step 5: Allow the Wreath to Dry
After you’ve placed and glued all your acorns, it’s time to let the wreath dry. This step is crucial to ensure that all the acorns are firmly attached. Allow the wreath to sit undisturbed for several hours or overnight. This gives the glue ample time to harden and secure the acorns. Once it’s scorched, gently shake the wreath to ensure no loose acorns. If any fall off, simply re-glue them.

Step 6: Add a Hanging Element
Now that all your acorns are secure, it’s time to add a way to hang your wreath. Cut a length of twine or ribbon, ensuring it’s long enough to loop through your wreath and hang from your preferred location. Thread the twine or ribbon through the wreath and tie a secure knot. Be sure to place your knot at the back of your wreath so it remains hidden when hung. Now, your acorn wreath is ready to be displayed!
Step 7: Display Your Acorn Wreath
Now that your acorn wreath is ready, it’s time to show it off! Hang it on your front door, over the mantel, or even on a bare wall that needs a little fall spirit. Ensure the location is suitable and won’t expose the wreath to harsh weather conditions, especially if you’ve used natural acorns.
The wreath should hang securely, and the hanging element should not strain or break under the wreath’s weight. Once hung, step back and admire your handcrafted piece of autumnal décor. Enjoy the rustic charm it adds to your home, and be prepared to receive compliments from guests!
Step 8: Maintain Your Acorn Wreath
Maintaining your acorn wreath will ensure it remains an eye-catching piece of décor for a long time. If you’ve used natural acorns, be aware that they can shrink or crack over time due to temperature changes.
If any acorns fall off or get damaged, simply replace them using the same technique you used to create the wreath. Dust your wreath regularly to keep it clean, and consider storing it in a cool, dry place when it’s not in use to preserve its look. Remember, your acorn wreath is decorative and a testament to your creativity and craftsmanship.

Step 9: Revisit Your Creation Each Season
One of the charms of your acorn wreath is its versatility through the seasons. You can add seasonal elements to keep it fresh and relevant throughout the year. For example, in the winter, consider adding small pine cones or bits of holly. You could weave in some fresh green vines or a few spring blooms as spring arrives. During the summer, small seashells or bright ribbons can add a fresh touch. Remember, the base of your wreath is neutral enough to support many different looks, so have fun with it!
Step 10: Share Your Craftsmanship
Once you’ve admired your work, it’s time to share it with others. Don’t hesitate to show off your knowledge of how to make an acorn wreath. You can gift your hand-crafted wreath to a loved one or even consider hosting a wreath-making party where you guide friends and family through the process. Sharing your creativity not only fills your home with seasonal charm but it also creates a memorable experience for those around you. Every time you see an acorn, you’ll be reminded of the joyous time you spent crafting your unique door decoration.
With these simple steps, you can master the art of making an acorn wreath. The process may seem daunting at first, but once you get started, it’s easy to see how fun and rewarding creating a handmade wreath can be.
5 Additional Tips and Tricks
- Collect Extra Acorns: It’s always better to have more than you think you’ll need. While crafting, some may break or not fit right, so having extras on hand can save you from mid-project acorn hunting.
- Vary Acorn Sizes: Using a variety of acorn sizes can add depth and texture to your wreath. Don’t shy away from using the small ones, as they are perfect for filling in the gaps.
- Use a Clear Acrylic Sealer: To add durability and longevity to your wreath, consider coating it with a clear acrylic sealer. This will provide a protective layer over your acorns, preventing them from moisture damage and the elements.
- Consider Color Variation: If you want to add a dash of color to your wreath, consider painting some of your acorns. Metallic colors like gold or bronze can add a festive touch, or you could match the colors to the current season.
- Storage Tip: Keep your wreath in a cool, dry place and cover it in a bag to prevent dust accumulation. Avoid storing heavy items on top of it to maintain its shape for the next season.
Following these additional tips and tricks, you can take your acorn wreath to the next level.

5 Things You Should Avoid
- Avoid Using Damaged Acorns: Broken or cracked acorns can weaken the structure of your wreath and are more likely to fall off. Always select the healthiest and most robust acorns for your wreath to ensure durability.
- Don’t Rush the Drying Process: Patience is vital when letting the glue dry. Rushing this step could result in loose acorns, compromising your wreath’s overall appearance and stability.
- Avoid Direct Sunlight and Moisture: Too much exposure to sunlight can fade the color of your acorns, and moisture can cause them to rot. Remember to hang your wreath in a shaded, dry area to keep it looking its best.
- Avoid Over-Decorating: While adding seasonal elements to your wreath is fun, going overboard can make it look cluttered. Maintain the elegant simplicity of your acorn wreath by choosing a few key elements for decoration.
- Don’t Neglect Maintenance: An acorn wreath requires regular care. Neglecting maintenance can result in a dusty and dull-looking wreath. Always dust your wreath and replace damaged acorns immediately and regularly.
Avoiding these common pitfalls can help you create a stunning, durable acorn wreath that can be admired for many seasons.
Conclusion
After reading this blog post, you are now well-equipped with the knowledge of how to make an acorn wreath. Armed with the supplies needed, a firm grasp on the steps outlined in this blog post, and your innate creativity, you have all you need to create a beautiful autumn-themed home decoration. Your acorn wreath will no doubt be a statement piece that will draw your guests’ attention and admiration.
Hopefully, the article on how to make acorn wreath has inspired you to unleash your inner artist and create a unique piece of décor for your home. Crafting is about having fun and letting your creativity run wild.
So what are you waiting for? Put on some music and get to crafting – your homemade, handmade acorn wreath awaits!