
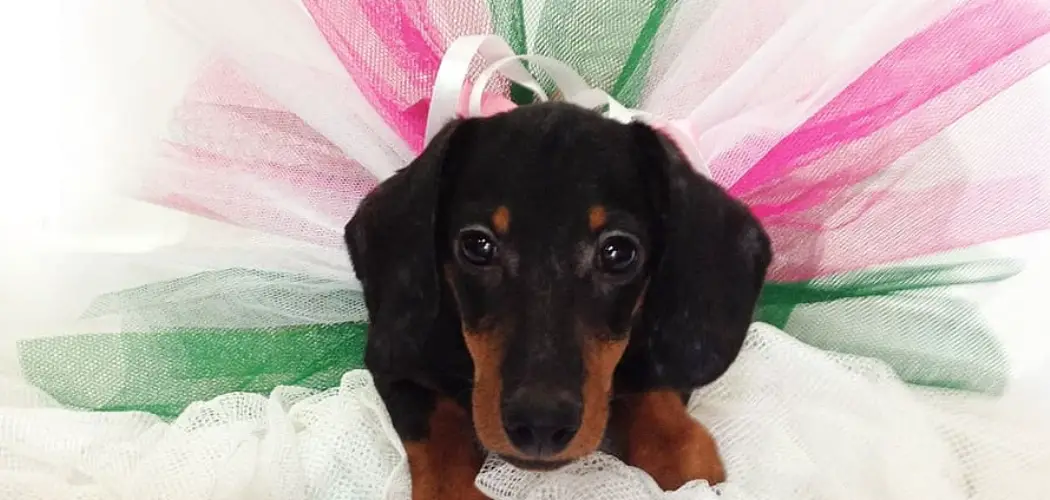
Are you looking to dress your pup in style? Then a tutu is just what the fashionista dog ordered! Tutu are easy and inexpensive to make and a great way to add some pizzazz to your pet’s wardrobe. Here’s how to make a dog tutu.
It’s hard to resist the cuteness of a doggie in a tutu! Not only are they adorable, but making your dog tutu is an excellent way to showcase both your sewing skills and show off your pup’s unique style at the same time. If you know basic sewing techniques and have access to fabric or tulle, this fun project can easily be completed quickly.

Whether you need inspiration for an upcoming doggie formal event or just want something special for everyday wear, we’ll show you how easy it is to make a custom tutu fit, especially for your pup.
What Will You Need?
Before you begin making the tutu, there are a few things that you will need to get started.
- A measuring tape
- Fabric scissors
- Elastic (1/2 inch wide)
- Thread and a sewing needle
- Tulle in the desired colors
Once you have gathered all your supplies, it’s time to begin making the tutu.
10 Easy Steps on How to Make a Dog Tutu
Step 1. Measure Your Dog’s Waist:
Measure around your dog’s waist (where her tutu will go) with the measuring tape. Ensure you get an accurate measurement. If your dog is in between sizes, it’s best to go with the larger size.
Step 2. Cut Your Elastic:
Cut the elastic to be slightly smaller than your dog’s waist measurement. This will provide some stretch for comfortable wear. You can also leave extra room for the fabric or tulle you will add.
Step 3. Sew the Ends of Your Elastic:
Using thread and needle, sew the ends of the elastic together to make a loop. It will look like a belt for your pup. Another option is to use a sewing machine if you have one.
Step 4. Cut Your Tulle Strips:
Cut several long strips (about 12 inches) of tulle fabric in desired colors. The number of strips depends on how full you want the tutu skirt to look; for a fuller look, cut more strips! Additionally, the strips can be partially even or perfect rectangles.

Step 5. Tie or Sew Your Tulle Strips:
Tie each strip around your elastic loop one at a time until all have been tied on. If you are using two colors, alternate between each. Use a double knot to ensure the strips stay in place. You can sew the tulle onto the elastic loop if you prefer sewing.
Step 6. Trim Your Tutu:
Trim any excess fabric at the ends of the tutu skirt. You can also trim down long fabrics for a more balanced look. Remember to use fabric scissors instead of regular scissors.
Step 7. Cut Short Pieces of Tulle:
Cut additional short pieces of tulle (about 2-3 inches in length) and tie these around your elastic loop on top of the other tulle strips that have been tied or sewn already. This will add some texture and color variation to your tutu dress! Moreover, you can add as many pieces as desired for the desired look.
Step 8. Try It On:
Try the tutu dress on your pup to make sure it’s the right size and fits properly. You may need to adjust the length of some of the strips or add more tulle if you want a fuller look. Check for any loose ends that need to be trimmed, and make sure the elastic band is secure.
Step 9. Final Touches:
You can also embellish the tutu dress with ribbons or fabric paint for an extra special touch! There are plenty of creative ways to make your pup’s tutu dress unique. Best of all, it will be one-of-a-kind.
Step 10. Ready, Set, Tutu!:
Your pup’s tutu is now complete and ready for her to show off her style! Whether attending a special event or just out for a walk around the park, your dog will turn heads in her handmade tutu dress. Remember to take lots of pictures and have fun!

By following these easy steps, you can make a fashionable tutu for your pup in no time! This is a great way to add some fun and flare to your pup’s wardrobe. Have fun and enjoy the compliments you get for your pup’s stylish tutu!
5 Additional Tips and Tricks
- To give your pup the perfect-fitting tutu, measure her waist or chest before you begin and mark the fabric accordingly.
- If using an elastic band to attach the skirt, be sure to knot it securely in place.
- Use a needle and thread to make small stitches around the edges of the tutu for added stability.
- Choose fabrics that won’t irritate your pup’s skin—cotton blends are best for dogs with sensitive skin!
- Consider decorating your pup’s tutu with rhinestones or other small embellishments to make it unique!
Have fun with it, and enjoy seeing your pup strut his stuff in his new tutu!
5 Things You Should Avoid
1. Don’t use sensitive fabrics: Avoid fabrics that can scratch or irritate your pup’s skin, such as rough denim or wool. Instead, go for softer fabrics such as cotton or jersey.
2. Don’t tie too tightly: Make sure the tutu isn’t so tight it restricts your dog’s movement or breathing. It should fit comfortably.

3. Don’t attach decorations with glue: Glue and other adhesives can be difficult to remove without damaging the fabric of the tutu, so use a needle and thread instead. As an extra precaution, make sure the decorations are secure and won’t come off easily.
4. Don’t forget to factor in growth: If you want your pup’s tutu to last longer than one year, always allow an extra few inches for them to grow into it! Try using an adjustable elastic band to fasten the waist.
5. Don’t skimp on safety: Check all the embellishments and decorations on your pup’s tutu to ensure they are safe and won’t come off easily. Make sure any small pieces, such as rhinestones or buttons, are securely attached.
No matter what you choose, you must consider comfort and safety when making a tutu for your pup! With these tips, you can create a unique tutu perfect for your special pup! Enjoy watching them prance around with their stylish new look!
5 Different Types of Tutu
1. Classic Tutu: A classic tutu is typically made from two or three layers of soft fabric such as tulle and has a single elasticated band to secure the waist.
2. Ruffled Tutu: For extra volume, look for a ruffled tutu—this style usually features multiple tiers of stiffer fabrics such as organza or satin with elastic at the waistband.
3. Tiered Tutu: If you want something different, try making a tiered tutu—it’s constructed from multiple strips of fabric sewn together, creating a unique layered effect.

4. Pom-pom Tutu: An easy way to jazz up your pup’s tutu is to add pom-poms! Simply sew some colorful pom-poms onto the fabric for a fun, eye-catching look.
5. Sequined Tutu: A sequined tutu can really stand out in a crowd—use sparkly sequins or glittery fabric to create this luxurious style.
No matter which type of tutu you make for your pup, it’s sure to be a showstopper at the next pet parade! Have fun with it, and enjoy seeing your pup strut their stuff in their dazzling new outfit!
How Do You Make a Fluffy Tutu?
- Gather your supplies: tulle, ribbon, the elastic band (optional), needle and thread, measuring tape, or ruler.
- Measure out the desired length of the tutu and cut enough strips of tulle to fit around your pup’s waist or chest, depending on where you plan to attach it.
- Bunch each strip of tulle together in the middle and use a sturdy piece of ribbon to tie them all together securely at one end, creating a loop for attaching the tutu.
- Use an elastic band or piece of ribbon to secure the tutu around your pup’s midsection. Make sure it fits comfortably but isn’t too tight!
- To create a fluffy look, layer multiple strips of tulle over each other and tie them together with a ribbon or elastic band.
- If desired, use a needle and thread to secure any stray pieces of fabric or embellishments such as rhinestones or sequins.
- Let your pup show off their new tutu!
Making a fluffy tutu is easy and fun—with just a few supplies, you can give your pup a unique look they’ll love! Have fun creating something special for your pup!
Conclusion
After crafting your adorable dog tutu, take a step back and admire your handiwork. Not only did you make something flashy and fun, but it was also a great exercise in creativity and problem-solving. If your pup seems to rock its new outfit more often than not, chances are it is happy with its new wardrobe addition and proud of you for making it in the first place!
Few other accomplishments can bring such satisfaction come from engaging with our furry friends. So who knows? You may discover a hidden talent in costume-making or even find yourself as a pet tailor! With just a few simple steps and materials around the house, crafting a one-of-a-kind tutu for your pup has never been easier.
The article on how to make a dog tutu was informative and helpful. Now that you have the know-how let’s get creative and make something special for your furry friend! Good luck! Happy crafting!
You Can Check It Out to Crochet a Dog Hat