
Are you looking to take your knitting skills to the next level? Then it’s time to learn how to make granny squares! This classic crocheting technique has been around for generations and is still revered as one of the most fun, creative projects in the craft world.

Plus, with just a handful of supplies and some practice, you too can master this age-old artistry. So if you’re ready to expand your crafting abilities, get ready for all the details on how to knit granny squares!
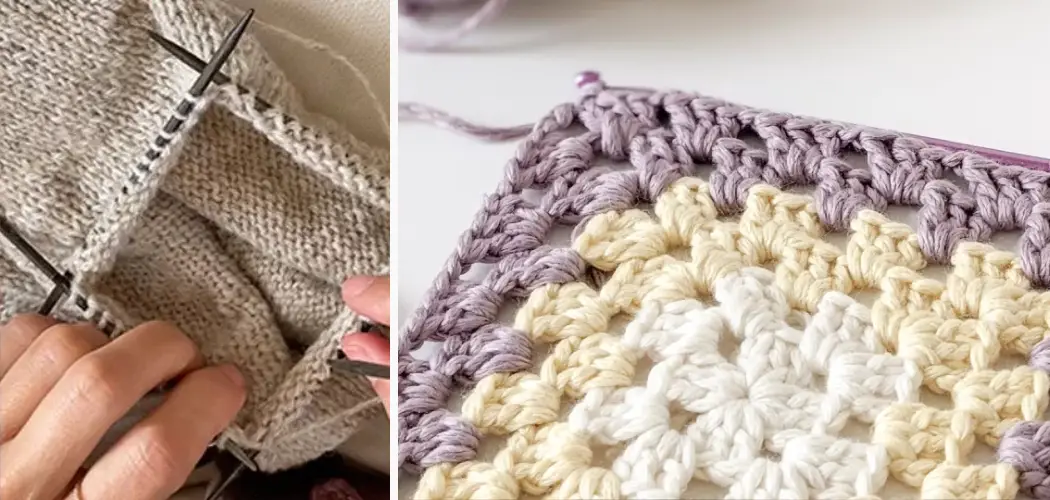
What are Granny Squares?
Granny squares are small square or rectangular pieces of woven fabric, typically created with yarn and a crochet hook. They are made up of multiple stitches and can be used to create larger projects such as blankets, scarves, or even clothing items. The possibilities for what you can make with granny squares are endless!
Supplies You Will Need to Knit Granny Squares
- Yarn in Various colors and textures
- Crochet Hook (size will depend on the yarn you choose)
- Scissors
- Yarn Needle
Step-by-step Guidelines on How to Knit Granny Squares
Step 1: Make a Slip Knot
To begin your granny square, you’ll first need to make a slip knot. This will be the starting point of your project and sets the foundation for the rest of your stitches. Making a slip knot is easy: take your yarn and create a loop, then pull the end of the yarn through the loop. Tighten the loop around your crochet hook. This will keep your yarn in place as you begin your stitches.
Step 2: Chain Stitch
Next, you’ll need to create a chain stitch. This is simply a series of loops that are joined together by pulling the yarn through each one. To create a chain stitch, wrap the yarn around your hook and pull it through the slip knot loop. Keep repeating this process until you have the desired number of stitches for your project.

Step 3: Single Crochet Stitch
Once you have a chain of stitches, you’ll need to work on your single crochet stitch. This is the basic stitch used to create a granny square and it’s made up of two parts: the yarn over and pull through, and then pulling your hook through the loops. Repeat this process until you reach the end of your chain stitches. This will create a straight line of single crochet stitches.
Step 4: Double Crochet Stitch
After completing your single crochet stitch, it’s time to move on to the double crochet stitch. This is a taller stitch that will create more height in your granny square. To begin, yarn over and insert your hook into the next stitch. Yarn over again and pull your hook through the stitch, then yarn over once more and pull your hook through the first two loops on your hook. Repeat this process until you have as many double-crochet stitches as you’d like for your project.
Step 5: Slip Stitch
To finish off your granny square, you’ll need to make a slip stitch. This will join your stitches together and create a seamless edge. To do this, simply insert your hook into the first single crochet stitch you created, yarn over, and pull through both loops on your hook. Then cut your yarn and pull it through the last loop to secure it in place. Make sure to leave a long enough tail for weaving in any loose ends.
Following these steps will give you the basic granny square design. However, feel free to experiment with different stitches and yarn colors to create unique variations of this classic technique. The more you practice, the better your granny squares will turn out!
Additional Tips and Tricks to Knit Granny Squares
1. If you want to add a border to your granny square, you can do so by simply switching colors after every few rounds. This will create an interesting contrast and give your square a more polished look.

2. Granny squares are great for using up leftover yarn scraps from other projects. You can mix and match different colors to create unique and colorful squares.
3. To avoid gaps or holes in your granny square, make sure to pull tight after each stitch. This will keep your square nice and tight.
4. If you want a thicker or denser granny square, you can use a smaller crochet hook. This will create tighter stitches and result in a sturdier square.
5. Granny squares don’t have to be limited to just blankets or Afghans. You can use them to create a variety of projects such as scarves, bags, or even clothing.
6. If you’re new to knitting, starting with granny squares is a great way to practice different stitches and techniques before tackling larger projects.
7. Don’t be afraid to get creative with your granny squares. You can experiment with different color combinations, and stitch patterns, and even add embellishments like buttons or beads.
8. Blocking your granny squares can help give them a more polished and professional look. This involves wetting the square and shaping it to the desired size before letting it air dry.
9. If you want to join multiple granny squares together, there are several options such as sewing, crocheting, or using slip stitches. Each method will create a different look, so choose the one that best suits your project.
Following these tips and tricks will not only help you create beautiful granny squares but also expand your knitting skills and creativity. So go ahead and start creating your own unique granny square projects today!
Things You Should Consider to Knit Granny Squares
1. First, you should consider the type of yarn you are going to use. Different types of yarn have different qualities, such as thickness and stretchiness.
2. You should also consider the size of your granny square. The standard size is around 4 inches, but you can make them smaller or larger depending on your preferences.
3. It’s important to choose a pattern that you like before starting to knit your granny squares. There are many different patterns available, so take your time to find the one that you like best.

4. Another thing to consider is the number of rounds you want in your square. The more rounds you have, the bigger your square will be.
5. You should also think about how many colors you want to use for your granny square. You can use just one color or multiple colors to create a unique design.
6. It’s important to have the right tools before starting your knitting project. Make sure you have the right needles and any other necessary tools for your chosen pattern.
7. You should also consider how many granny squares you want to make for your project. This will help you determine how much yarn you need to buy.
8. Don’t forget to consider your skill level when choosing a pattern. Some patterns are more complex and require advanced knitting skills, while others are more suitable for beginners.
Following these considerations will help you create beautiful and well-made granny squares. Remember to have fun and be creative with your project! Happy knitting!
Frequently Asked Questions
How Do I Start Knitting Granny Squares?
To start knitting granny squares, you will need a basic understanding of knitting techniques such as casting on, knit stitches, and purl stitches. You can find many easy-to-follow tutorials online that will guide you through the process step-by-step. Once you have mastered these basic skills, you can then move on to more intricate patterns and designs.
What Materials Do I Need?
To knit granny squares, you will need a set of knitting needles, yarn in various colors, and a pair of scissors. The size of your needles and the weight of your yarn may vary depending on the desired thickness and texture of your finished square.
Can I Use Any Yarn to Knit Granny Squares?
Yes, you can use any type of yarn to knit granny squares. However, certain types of yarn may produce different results in terms of texture and appearance. It is recommended to experiment with different yarns to find the one that works best for you.
How Many Granny Squares Do I Need?
The number of granny squares you need will depend on the size and purpose of your project. For a small blanket, you may only need 20-30 squares, while a larger project may require 100 or more. It is best to plan out your design and estimate the number of squares needed before starting.
Can I Join My Granny Squares With Different Methods?
Yes, there are several methods you can use to join your granny squares together. Some common techniques include whip stitch, single crochet, and slip stitch. Each method will produce a different effect, so it is best to try out a few to find the one that works best for your project.

Conclusion
Now you know how to knit granny squares and have answers to some frequently asked questions. Remember to have fun and experiment with different patterns, colors, and joining methods to create unique and beautiful projects! Happy knitting!