
Working with heat transfer vinyl (HTV) opens up a world of endless creative possibilities, allowing crafters to personalize garments, accessories, and home decor items with unique designs. However, even the most seasoned crafters are not immune to making mistakes during the heat transfer process.
Whether it’s a misaligned design, an uneven press, or peeling vinyl, encountering hiccups in your HTV projects can be frustrating. The good news is that these mistakes can often be rectified with some creative problem-solving and a few expert tips.

In this comprehensive guide, we will delve into the art of how to fix heat transfer vinyl mistakes, transform blunders into opportunities for innovation, and turn your crafting mishaps into stunning, professional-looking results. So, let’s embrace the challenges and explore the tricks to troubleshoot and salvage HTV projects with ease and confidence.
Overview of Heat Transfer Vinyl (HTV)
Heat transfer vinyl is an essential material for any crafter or fashion designer. It’s a popular fabric used to add unique designs to t-shirts, bags, hats, and more. But working with HTV can be tricky if you’re not familiar with it. Mistakes can and do happen—but don’t worry! In this article, we’ll explain how to fix heat transfer vinyl mistakes.
First, let’s start with a quick overview of HTV. This type of fabric is made up of two main parts: the carrier and the design layer. Both layers are essential for producing smooth and even-looking results with your projects.
The carrier is a kind of material that helps you to move or place the HTV where it needs to go. It also gives you a way to easily hold the HTV during the application process. The design layer is what contains your desired artwork or pattern printed on it.
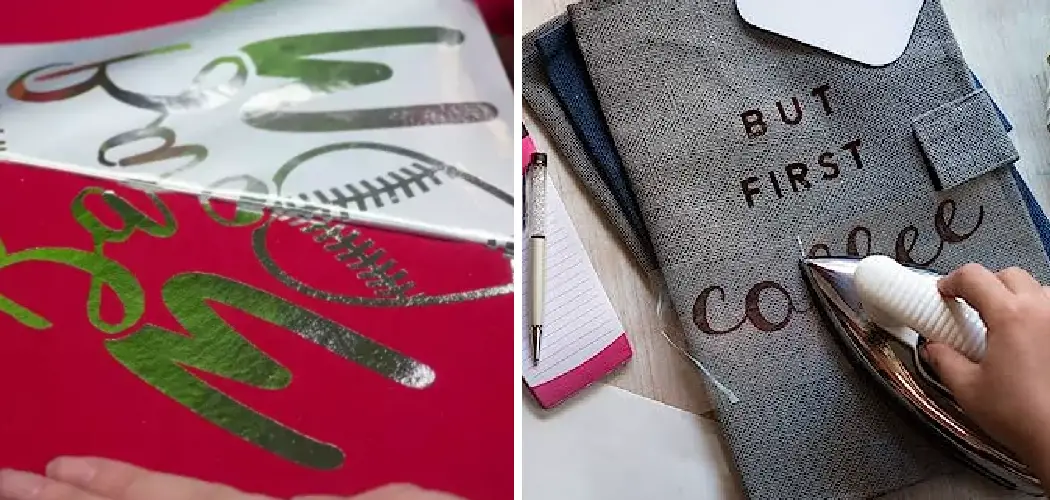
Now that we know the basic structure of HTV, let’s move onto how to fix any mistakes you may have made while working with it. If your mistakes are minor, such as bubbles or edges not sticking, you can simply try using a heat press.
This is essentially a large machine that applies pressure and heat to the HTV, helping it to stick onto the fabric better. Simply place your project between two pieces of heat-resistant material and then press down on the handle of the machine until it beeps.

Importance of Understanding and Addressing Mistakes
When it comes to heat transfer vinyl mistakes, they can often be frustrating and time consuming to try and address. For this reason, it is important to understand how best to handle them so that any issues are resolved as quickly as possible. Knowing the correct techniques for fixing mistakes with heat transfer materials will help ensure that your end product looks professional and well-crafted.
In order to address the mistakes that can occur when working with heat transfer vinyl, it is important to take a few steps. First and foremost, you should be sure to practice patience. Taking a step back from any mistake and taking some time to assess your options will help prevent further issues being caused by attempting to fix mistakes too quickly or without the right knowledge or techniques.
It is also important to ensure that you have the right tools and materials on hand prior to beginning a project with heat transfer vinyl, as this will help prevent mistakes from occurring in the first place.
10 Methods How to Fix Heat Transfer Vinyl Mistakes
1. Realign Misplaced Designs:
One of the most common HTV mistakes is misalignment, where the vinyl design is placed inaccurately on the garment or item. To fix this, gently lift the vinyl using a weeding tool or tweezers. If the vinyl hasn’t been fully adhered, reposition it carefully to the desired location.
For designs that have already been pressed, apply a heat-resistant tape over the design, lift it, and then reposition it before pressing it again with the heat press or iron. Ensure to use a Teflon sheet or parchment paper to protect the vinyl from direct heat during reapplication.

2. Remove Vinyl Residue:
Occasionally, you might encounter small pieces of vinyl or adhesive residue left on the garment after weeding or pressing. To remove these stubborn remnants, use a heat-resistant adhesive remover or rubbing alcohol. Apply the remover on a clean cloth and gently rub the affected area until the residue lifts away.
Be cautious not to damage the fabric or design during the process. Always test the remover on a hidden area of the fabric before using it on the visible part of the garment.
3. Fix Uneven Pressing:
An uneven press can lead to parts of the design adhering properly while other areas are not fully bonded to the fabric. To fix this, reapply heat to the areas that need better adhesion.
Cover the entire design with a Teflon sheet or parchment paper and press it again with your heat press or iron. Ensure to use the same temperature and pressing time as in the original application. This will help even out the heat distribution and complete the bonding process.
4. Eliminate Air Bubbles:
Air bubbles trapped between the vinyl and the fabric can cause lifting or uneven adhesion. To get rid of air bubbles, gently lift the affected area and reapply heat.
As the vinyl softens, press down on the design using a Teflon-coated heat-resistant tool, such as a rubber spatula or brayer, to smooth out the vinyl and remove any trapped air. Continue pressing until the entire design is firmly adhered to the fabric.
5. Tackle Peeling Vinyl:
If you notice that the vinyl is peeling off the fabric after pressing, it might be due to insufficient heat or pressure during the initial application. To fix peeling vinyl, reapply heat and pressure using a heat press or iron.

Place a Teflon sheet or parchment paper over the design and press firmly for the recommended time and temperature. This will help the adhesive to re-bond with the fabric and prevent further peeling.
6. Layering and Registration Errors:
When working with multi-layer designs, registration errors may occur, resulting in misaligned layers. If you notice misalignment, carefully lift the top layer of vinyl and reposition it to match the underlying layer correctly.
Use heat-resistant transfer tape or masking sheets to hold the layers in place during reapplication. Press the design again with the recommended time and temperature to ensure proper bonding.
7. Repair Torn Vinyl:
Accidentally tearing the vinyl can happen, especially with intricate designs or when weeding. If you encounter a torn vinyl piece, you can salvage it by piecing it back together like a puzzle. Align the torn edges as closely as possible, and use heat-resistant tape or transfer tape to hold them in place during pressing.
Press the repaired area to re-bond the vinyl. While the repair might not be entirely seamless, it can be a practical solution for small tears.
8. Masking to Cover Mistakes:
If your HTV mistake is irreparable, consider using a masking technique to cover it up creatively. Cut a piece of HTV in a complementary color or pattern and apply it over the mistake, effectively concealing it. This method works best for small errors or minor imperfections that won’t affect the overall design. Ensure the masking HTV adheres securely by pressing it with a heat press or iron.

9. Add Embellishments:
Transform an HTV mistake into an opportunity for embellishment by adding elements like rhinestones, sequins, or fabric paint. These additions can enhance the design, drawing attention away from any imperfections. Get creative and incorporate additional elements that align with your original vision for the project. The result may turn out even better than your initial plan.
10. Learn and Prevent Future Mistakes:
The best way to fix HTV mistakes is to avoid them in the first place. Learn from your past mishaps and analyze what caused them. Take note of the materials, settings, and techniques you used during the project. Keep a crafting journal or use digital notes to record your experiences and insights.
By identifying patterns and areas for improvement, you can refine your approach to HTV projects and significantly reduce the likelihood of making the same mistakes in the future.
Common Mistakes of Heat Transfer Vinyl (HTV)
When it comes to applying your heat transfer vinyl (HTV) designs, mistakes can happen. Whether it’s from incorrect temperature settings or an issue with the design itself, knowing how to identify and fix mistakes is key when working with HTV. To get the best results, here are some common mistakes you should look out for:
- Not Pre-Washing Your Shirt: Before you apply your heat transfer vinyl, make sure to pre-wash your shirt. This will help to remove any oil or debris that may prevent adhesive from properly sticking.
- Setting Incorrect Heat Settings: Using the wrong temperature settings can cause either a wrinkled or melted design. To avoid this, be sure to use the recommended heat settings for your HTV.
- Not Measuring Your Design: Make sure to measure your design to ensure that it fits perfectly on your shirt. To make this process easier, you can create templates in advance using paper or tracing paper.
- Applying Too Much Pressure: When pressing down on the design with an iron, be sure not to hold it down for too long. Too much pressure can cause your design to become wrinkled or distorted.
- Not Letting the HTV Cool: After pressing the design, make sure to let your HTV cool completely before trying to remove the transfer sheet. If you try and remove it too early, it could cause the adhesive backing to come off with the sheet.

These are some of the most common mistakes when it comes to working with heat transfer vinyl. With a bit of practice and patience, you can easily learn how to avoid these missteps and create beautiful designs using HTV!
Conclusion
To sum up, fixing heat transfer vinyl mistakes is incredibly important for any design project. Understanding the basics of how to transfer and layer heat transfer vinyl will help reduce the risk of errors occurring. Having a plan for troubleshooting errors if they occur will also help guarantee successful results every time.
Patience and practice make perfect – it is easy to become frustrated when things don’t go according to plan, but consider this a learning experience and use it as an opportunity to understand the entire process better. Follow these simple instructions outlined in this blog post about how to fix heat transfer vinyl mistakes, and you’ll be able to get the job done with ease.