
Embossing cards adds an elegant and tactile dimension to your handmade creations, turning ordinary paper into a canvas of texture and sophistication. Whether you’re crafting personalized greeting cards or adding a unique touch to special occasion invitations, learning how to emboss cards opens up a world of creative possibilities.

In this article, we’ll guide you through the step-by-step process of embossing cards, exploring both dry embossing with embossing folders and the heat embossing technique.From choosing the right materials and tools to mastering the art of heat embossing with powders, this comprehensive tutorial caters to both beginners and seasoned crafters.
Elevate your card-making skills as we delve into the intricacies of embossing, allowing you to infuse your creations with a touch of handmade charm and artistic flair.
Different Types of Embossing
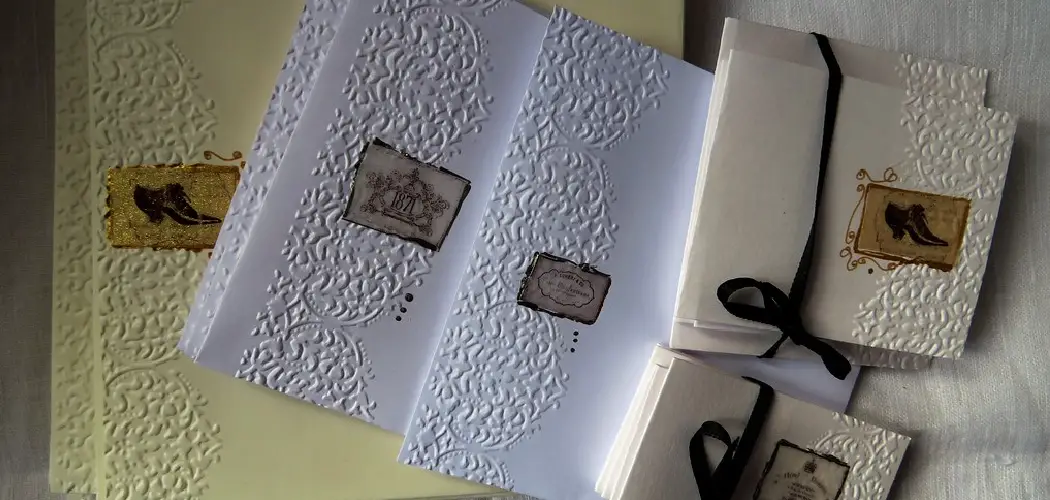
The art of embossing has been around for hundreds of years, and it continues to be a popular technique among crafters and artists. Embossing is the process of creating raised designs or patterns on a surface, typically paper. It adds a beautiful tactile element to any project and can elevate simple cards into works of art.
There are several types of embossing techniques, each with its own unique characteristics and uses. Let’s explore the different types of embossing in more detail.
Dry Embossing
Dry embossing, also known as relief or dry-pressed embossing, is the most traditional form of embossing. It involves using a stylus or specialized tools to create raised designs on paper without any heat or moisture. Dry embossing is often done on lightweight paper or cardstock, and it works best with detailed designs.

Heat Embossing
Heat embossing uses heat to melt special powders onto paper, creating a raised design that stands out. This technique requires the use of special embossing powder, which comes in a wide range of colors and finishes, including metallic, glitter, and even glow-in-the-dark. Heat embossing is a great way to add a touch of elegance and shine to any project.
Wet Embossing
Wet embossing, also known as wet ink or stamp embossing, combines elements of dry and heat embossing techniques. It involves using a stamp, embossing ink pad, and embossing powder to create raised designs on paper. Unlike dry or heat embossing, wet embossing requires the use of a stamp with a detailed design.
10 Methods How to Emboss Cards
1. Heat Embossing
Heat embossing is a popular method of creating raised designs on cards and other paper crafts. This method involves using a heat tool to melt embossing powder onto the surface of the card. The heat melts the powder, which then sets into a raised design when it cools. This method works best with thicker cardstock and can be used to create intricate designs.
2. Dry Embossing
Dry embossing is another popular method of creating raised designs on cards and other paper crafts. This method involves using an embossing folder or stylus to press a design into the surface of the card. The pressure causes the fibers in the paper to rise up, creating a raised design when viewed from the front.
3. Stamping
Stamping is one of the easiest ways to create raised designs on cards and other paper crafts. This method involves using an ink pad and rubber stamp to transfer an image onto the surface of the card. The ink will remain wet until it dries, allowing you to add further embellishments such as glitter or sequins for extra texture and dimension.

4. Foil Embossing
Foil embossing is another popular way to create raised designs on cards and other paper crafts. This method involves using a special foil adhesive and foil sheets to transfer an image onto the surface of the card. The adhesive creates a bond between the foil sheet and the cardstock, resulting in a raised design when viewed from the front.
5. Die Cutting
Die-cutting is another great way to create raised designs on cards and other paper crafts. This method involves using dies that have been specifically designed for cutting out shapes or letters from cardstock or other materials such as felt or foam sheets. The cuts are precise, allowing for detailed designs that would otherwise be difficult to achieve by hand-cutting with scissors or craft knives.
6. 3D Foam Tape
3D foam tape is another great way to add dimension to your cards and paper crafts without having to use any kind of heat tool or special equipment. This type of adhesive tape has two layers – one layer that sticks directly onto your project’s surface, while an additional layer creates a 3D effect when applied over the top of it, giving your project more depth and texture without added bulkiness or weight.
7. Layering Techniques
Layering techniques are also great ways to add dimension to your projects without having to use any kind of heat tool or special equipment. By layering different materials such as patterned papers, ribbons, buttons, beads, etc., you can create unique textures that stand out against each other in interesting ways.

8. Glitter Embellishments
Glitter embellishments are also great ways to add sparkle and shine to your projects without having to use any kind of heat tool or special equipment! Glitter comes in many different colors and sizes so you can find something that suits whatever look you’re going for! Simply apply some glue (or double-sided tape) onto your project’s surface before pressing down some glitter for extra sparkle!.
9. Thread Wrapping
Thread wrapping is also a great way to add texture and dimension without having too much bulkiness or weight! All you need is some thread (preferably embroidery floss) along with some basic sewing skills! You can wrap around shapes such as circles, squares, stars, etc., depending on what look you’re going for!
10. Button Embellishments
Button embellishments are also great ways to add texture and dimension without too much bulkiness or weight! Buttons come in many different colors, sizes & shapes so there are plenty of options available for whatever look you’re going for! Simply attach them to your project’s surface with glue (or double-sided tape) before pressing them down firmly into place!
Things to Consider When Embossing Cards
Embossing cards is a popular technique used in card making and paper crafting. It creates a raised, textured design on the surface of the card, adding dimension and interest to your project. It’s a simple yet effective way to take your card making skills to the next level.
Type of Embossing
There are two types of embossing: dry and heat. Dry embossing uses a stencil or embossing folder and applies pressure to create the raised design, while heat embossing uses an embossing powder that is melted with heat to create a raised effect. Both techniques have their own benefits and can be used together for a more intricate design.

Tools and Materials
To emboss cards, you will need some basic tools and materials such as an embossing machine, embossing folders or stencils, cardstock, and embossing powder. It’s important to invest in good quality tools and materials to achieve the best results. You can also experiment with different types of cardstock and embossing powders to create different effects.
Design Considerations
Before starting your project, think about the design you want to achieve. You can use pre-made designs from embossing folders or stencils, or create your own custom designs using stamps or die-cutting machines. It’s also important to consider the placement of the embossed design on your card. You can choose to emboss the entire front of the card, create a border, or add smaller embossed details.
Common Mistakes to Avoid When Embossing Cards
Skipping the Test Run
Before embarking on your final project, it’s important to do a test run with your chosen cardstock and embossing powder. This allows you to adjust the pressure or heat settings on your machine and ensure that you get the desired result.
Over-Embossing
It can be tempting to keep adding layers of embossing powder to achieve a more dramatic effect, but too much heat can cause the paper to warp. Start with one or two layers and gradually build up as needed.
Using the Wrong Ink
Not all inks are suitable for embossing. Pigment inks, such as VersaMark or Distress Embossing ink, work best as they stay wet for longer and allow the embossing powder to adhere.
Imperfect Stamping
Embossing magnifies any imperfections in your stamping, so make sure to use a stamping platform or acrylic block to get a clean and even impression.
Conclusion
In the end, embossing illuminates a card’s design, giving it a level of depth and interest that can’t be found elsewhere. To bring these effects to life, you need specialized tools for embossing and now that you have the basics in hand, you are ready to create some beautiful embossed cards of your own. With a few simple supplies and a bit of practice, you can make stunning papercrafts that have extra dimension and texture – even if you are just starting out!
From finding inspiration all the way to sealing and decorating your finished piece, getting involved with embossing gives you many opportunities for creative expression. Give yourself permission to experiment, stay curious and have fun discovering with embossing – we guarantee you’ll enjoy the ride! Ready to give it a go? Let’s get started on how to emboss cards!