
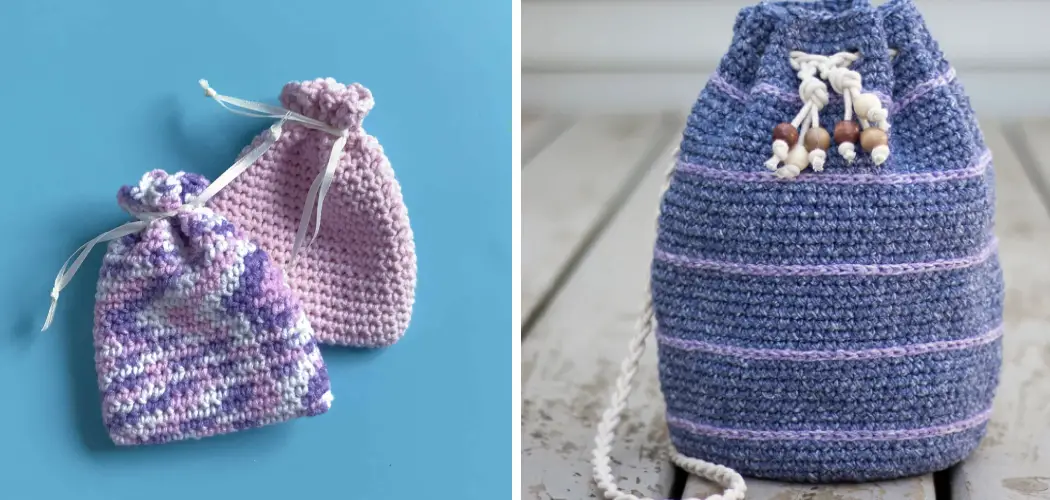
Are you looking to learn a new skill? Maybe you’re already an avid crocheter or maybe you’ve never even picked up a hook. Whatever your experience level, this tutorial will guide you through the process of making a small pouch with nothing but some yarn and some determination! You’ll soon be well on your way to creating beautiful keepsakes for yourself or as thoughtful gifts for those special people in your life.

From beginner-friendly instructions to tips and tricks from more advanced crafters, this blog post on how to crochet pouch has something for everyone. So let’s get started crafting!
Advantages and Disadvantages
Given below are some of the advantages and disadvantages of crocheting a pouch:
Advantages:
- It’s an Inexpensive Way to Make Unique and Creative Items.
- Crocheting is Relatively Easy to Learn Compared to Other Needlework Crafts.
- You Can Use Up Small Amounts of Yarn Left Over From Other Projects.
- It’s a Great Form of Stress Relief and Can Be Done Anywhere.
- You Don’t Need to Buy Any Special Equipment Beyond a Hook, Yarn, and Scissors.
- Once You Get the Hang of It, Crocheting is Very Satisfying.
Disadvantages:
- It Can Take Time to Learn How to Read Patterns and Follow Instructions.
- Results Can Be Time-consuming, Especially for Complicated Projects.
- It’s Not a Great Choice for Clothing That Needs to Fit Perfectly Due to the Difficulty of Measuring Gauge Accurately.
- Crocheting Items With Very Fine Yarn Can Be Difficult on Your Hands and Cause Pain or Cramping.
Needed Tools and Materials
Given below are some tools and materials that you’ll need for the project:
- Crochet Hook – Size G or 4.0 Mm is Recommended
- Yarn – Medium-weight Yarn is Best for This Project.
- Tapestry Needle
- Scissors
- Stitch Markers
- Measuring Tape (Optional)
11 Step-by-step Guidelines on How to Crochet Pouch
Step 1: Prepare the Materials
Gather all of your supplies and make sure you have everything on hand before getting started. It’s always nice to be prepared! But don’t worry, you can always make adjustments as you go. You can also use different colors of yarn to make the pouch more unique.

If you’re using multiple colors, make sure to have enough of each one to complete the project. It’s also a good idea to have an extra ball of yarn on hand in case you run out before the project is done.
Step 2: Start With a Slip Knot
To start your pouch, make a slip knot on your crochet hook. This will be the starting point for your pouch. Make sure it is not too tight or too loose. Otherwise, it could make the pouch difficult to work with.
It’s important to get the tension right on this start knot, so take some extra time and practice if needed. This step will set the foundation for your entire pouch. You’ll also want to make sure that your slip knot is centered on the hook.
Step 3: Make the Foundation Chain
Once you have a slip knot, it’s time to make the foundation chain. This is where you get to decide how wide and tall you want your pouch to be. A good rule of thumb is to chain at least 42 stitches or more depending on the size of your yarn and hook.
Make sure each stitch is even and that you are not pulling too tightly or loosely. It might help to mark the end of each chain with a stitch marker or piece of yarn so you can track your progress.
Step 4: Single Crochet Stitches
Now it’s time to start working on the single crochet stitches (also known as sc). To do this, insert your hook into the second chain from the hook and yarn over it. Pull up a loop, yarn over again and pull the yarn through both loops. Continue this process until you have completed one row of single crochet stitches.
But remember, do not count the chain at the beginning as a stitch. It’s important to make sure each stitch is even and that you are not pulling too tightly or loosely. However, if you find that your stitches are too loose or too tight, it’s okay to go back and adjust them.

Step 5: Increase Stitches
When it comes to increasing your stitches, there are a few different options. You can either do an increase stitch (also known as inc) or two single crochet stitches (also known as sc2tog). To do an inc stitch, insert your hook into the same stitch and yarn over. Pull up a loop, yarn over again and pull the yarn through both loops.
This will create one new stitch. For a sc2tog, insert your hook into the next stitch and yarn over. Pull up a loop, yarn over again and pull the yarn through both loops. Repeat this with the following stitch and you’ll have two new stitches.
Step 6: Decrease Stitches
When it comes to decreasing your stitches, there are also a few different options. You can either do a decrease stitch (also known as dec) or two single crochet stitches together (also known as sc2tog). To do a dec stitch, insert your hook into the same stitch and yarn over. Pull up a loop, yarn over again and pull the yarn through both loops.
This will reduce one stitch. For a sc2tog, insert your hook into the next stitch and yarn over. Pull up a loop, yarn over again and pull the yarn through both loops. Repeat this with the following stitch and you’ll have two fewer stitches.
Step 7: Finishing the Second Row
Now it’s time to finish up the second row. Insert your hook into the next stitch, yarn over and pull up a loop. Yarn over again and pull the yarn through both loops. Continue this process until you reach the end of the row. At this point, you should have an even number of stitches. Although, don’t worry if you have an odd number of stitches.

You can always adjust this later on. It’s important to make sure each stitch is even and that you are not pulling too tightly or loosely. But if you find that your stitches are too loose or too tight, it’s okay to go back and adjust them.
Step 8: Starting the Third Row
To start the third row, chain one stitch before inserting your hook into the first stitch of the previous row and repeating step 7. This will create a nice stitch pattern on your pouch. Keep repeating this process of chaining one before starting a new row until you have reached your desired height for the pouch.
It’s important to make sure each stitch is even and that you are not pulling too tightly or loosely. But if you find that your stitches are too loose or too tight, it’s okay to go back and adjust them.
Step 9: Fasten Off and Weave in Ends
Once you’ve finished the last row, it’s time to fasten off. Cut your yarn leaving a tail of about 8” and pull the tail through the last loop on your hook. Now weave in any loose ends with a tapestry needle so that everything is nice and secured. This step is important for making sure your pouch looks neat and finished.
It’s also a good idea to take the time to block your pouch at this point. This process will help the stitches stay in place and give it a more polished look. Buying a blocking board or using a piece of cardboard or foam can make this process much easier.
Step 10: Make the Drawstring
To make the drawstring for your pouch, cut a length of yarn (about 3 times as long as your pouch) and thread it onto your tapestry needle. Starting at one corner, go in and out of each stitch along the top of the pouch. Once you reach the opposite corner, tie a knot to secure the drawstring in place.

It’s important to make sure the drawstring is snug, but not too tight. Otherwise, it could pull on the stitches and damage your pouch. This step will give your pouch a professional look and make it easier to open and close. But don’t worry if you make a mistake—you can always undo and redo it until it looks perfect.
Step 11: Final Touches
Now for the finishing touches! To make sure your pouch closes securely you can add a few stitches along the top of the pouch. You can also add decorative stitching to give it an extra special touch. Once you’re happy with how it looks, your pouch is ready to go!
Always remember to keep your pouch away from extreme heat and humidity, as this can damage the fabric. It’s also a good idea to store it in a dry and cool place. Now you can show off your handmade pouch to all your friends and family! This is a great way to give handmade gifts and show off your crochet skills.
Now that you know how to crochet pouch, why not try out other projects too? With just some yarn and creativity, the possibilities are endless! With a bit of practice and patience, you’ll be able to make beautiful items in no time. Have fun crafting!
How Much Could It Cost?
Making a crochet pouch is surprisingly cost-effective. Depending on the size and complexity of your project, you can expect to spend around $15-$20 for all the necessary materials. This includes yarn, needles, tapestry needles, stuffing or any additional embellishments you may need.

It also helps to have some basic tools like scissors and stitch markers on hand. If you already have these items, then the cost of the project can be reduced even further. And if you’re feeling generous, why not purchase some extra yarn and materials so that you can make more than one pouch?
Frequently Asked Questions
Q: What Type of Yarn Should I Use for the Pouch?
A: Medium-weight yarn works best for this project. It’s important to pick a yarn that won’t stretch too much so your pouch will be sturdy and hold its shape.
Q: How Do I Weave in the Ends?
A: Tuck the end of your yarn into a tapestry needle and weave in and out of each stitch along one side. Then, do the same on the other side. This will ensure that all ends are secured and won’t come undone.
Q: What Other Projects Can I Make With Crochet?
A: The possibilities are endless! You can use crochet to make anything from hats and scarves to blankets and bags. With a bit of practice, you’ll be able to create beautiful items with ease. Have fun exploring the world of crochet!

Q: What Stitch Should I Use to Make the Pouch?
A: Single crochet stitches (also known as sc) work best for this project. This stitch creates a tight fabric which will give your pouch structure and help it keep its shape. It’s also easy to learn so you can get started right away. Have fun!
Conclusion
When it comes to crocheting a pouch, the possibilities are truly endless. With some creativity and dedication, you too can take on this multi-faceted craft and make something truly unique. Put your own spin on it and make something special from start to finish; after all, no one else in this world has the same ideas that you do.
Whether it’s for yourself or a gift for someone you love, getting creative with crocheting will definitely be worth considering when you take the plunge. So don’t hesitate—roll up your sleeves, get out those crochet needles and start making your very own personalized pouch today! Thanks for reading this article on how to crochet pouch.